

- Home
- Calendar
- Regional Tourney Info
- Bridge Fest
- About Us
- NAP & GNT Info

- Tournament Results
- Conditions of Contest
- Member Achievements
- D25 Players in the News
- Officers, Admin and other Contacts
- From the President's Table
- Newsletters
- Unit Websites
- Health and Safety Policy
- Links to Other Sites
- Tips for Tournaments
- Archives
- Contact Us
1. Four programs create many records on at least one file. Before running any of those programs, it is important to create a copy of all files affected.
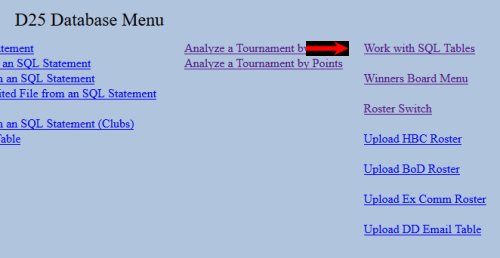
1.1 The program to backup and restore files is the first one in the rightmost column on both the Database Menu and the Winners Board Menu of both the local and remote systems.
The routines in this option are commonly used to copy and restore four sets of tables.
1.1.1 The advancement table, which is in green, is used by the program on the Database Menu to record advancements in rank.
1.1.2 The attendance, D25_points, and other_attendance tables, which are in red, are used by the program on the Database Menu that record attendance at tournaments.
1.1.3 The players and players_date_points tables, which are in blue, are used by the programs on the Database Menu that process ACBL roster files.
1.1.4 The winners_link and winners_link_players tables, which are in purple, are used by the programs on the Winners Board Menu that create winners links.
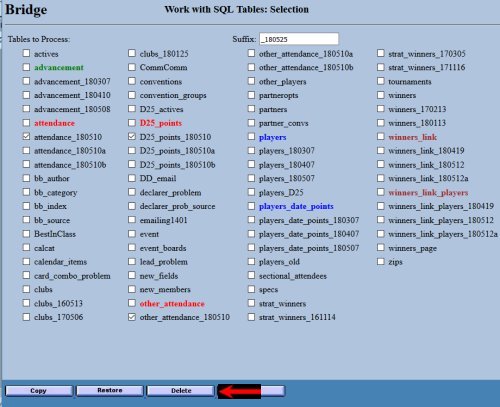
1.2 The first step is usually to delete copies of files that are no longer needed. Click on the boxes next to the files to be deleted. Make very sure that you are only deleting obsolete backup files. These are the ones that end in _YYMMDD, where YYMMDD is a date. Then click on the “Delete” button at the bottom. The screen will reappear with a message at the bottom detailing whether the files were deleted.
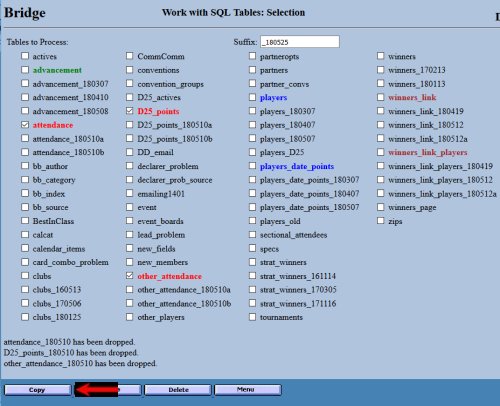
1.3 To make new backup copies of the files, select the files to be copied. Check the value of the “Suffix” field against the list of backup files beneath each file to be copied. Clicking on the “Copy” button will create new files and populate them with the values in the existing files, but it cannot do that if the files with those names already exist.
1.3.1 If the suffix has already been used, alter the value of the “Suffix” field by placing a letter after the displayed date or by entering a different date.
1.3.2 After you click on “Copy” the screen will reappear with the new files listed.
1.3.3 Messages will appear at the bottom detailing which files were created and populated. Do not leave the screen until all files have been successfully copied with the same suffix.
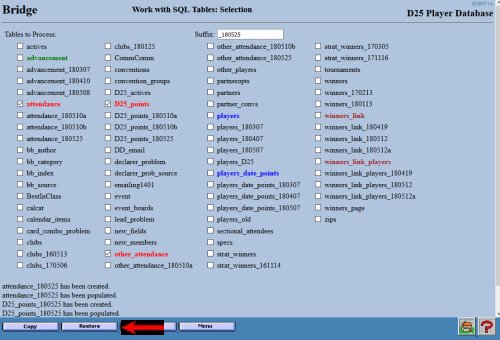
1.4 If you need to restore from the backup copies:
1.4.1 Change the value of the “Suffix” field to match the suffix on the backup copies.
1.4.2 Select the files (without the suffixes) to be restored.
1.4.3 Click on the “Restore” button at the bottom. The screen will display again with messages at the bottom detailing the success of the actions.
2. The entire database can be backed up using the export function of phpMyAdmin.
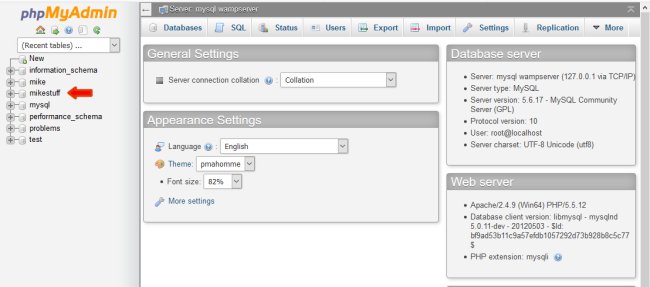
2.1 On the local system the URL for phpMyAdmin is http://localhost/phpmyadmin/ You will need to select the database, which is called mikestuff, from a pull-down menu.
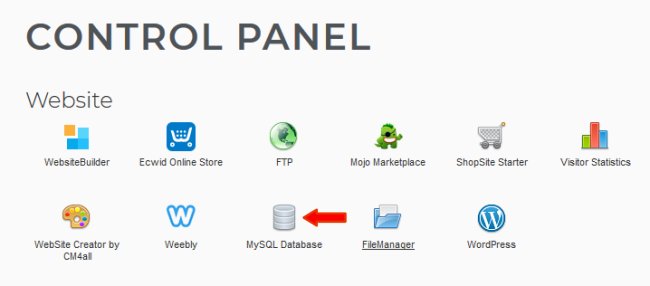
2.2 On the remote system the option for phpMyAdmin is located on the control panel. Click on the icon for phpMyAdmin on the line for your user ID.
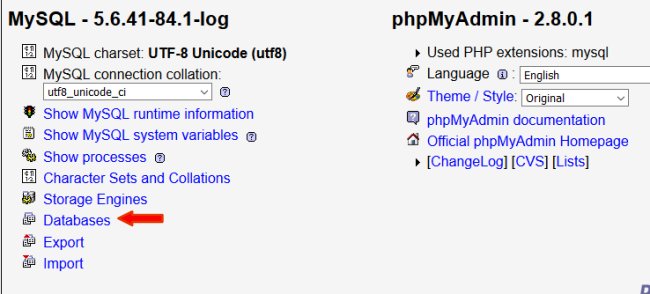
2.3 You should then click on Databases.
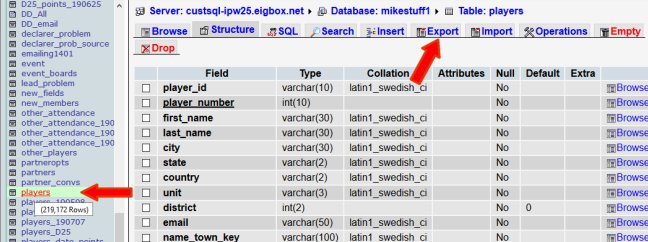
2.3 Click on the word "players" in the frame on the left that lists the tables and views in the database and then the “Export” button at the top of the screen.
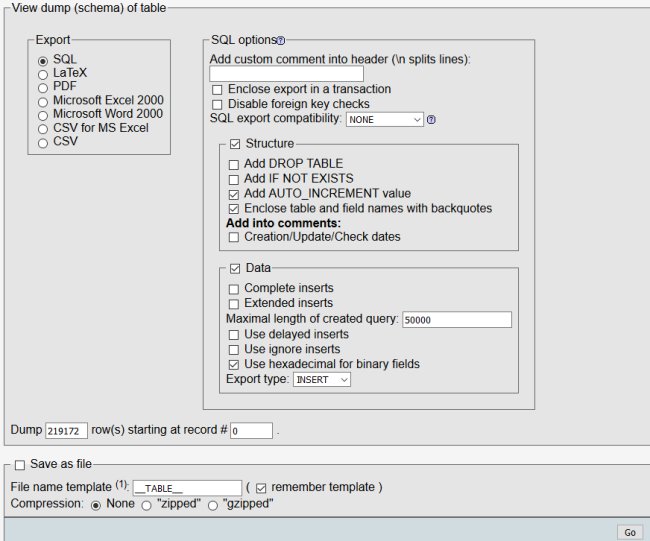
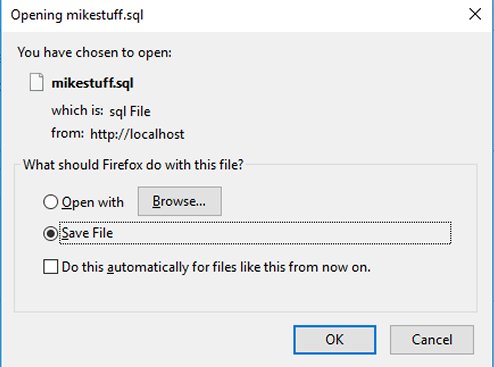
2.3.1 Select the “SQL” option on the first screen, and make sure that the checkbox for “Save as file” is checked. Accept all of the other default values, and click on the “Go” button. It will create a file with over 200,000 SQL statements. This will probably take a few minutes.
2.3.3 The Downloads section of the browser will display a message when the process has been completed. Right-click on the message and select “Open Containing Folder.” The screen above came from FireFox. Your browsers behavior might be somewhat different.
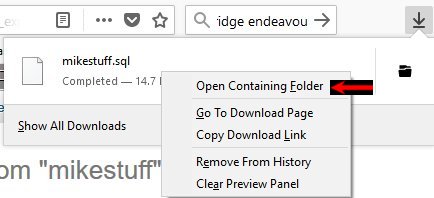
2.3.4 In the list of downloaded files select mikestuff.sql, copy it and paste it to the folder used for backups. Then change the name to one that includes the date, e.g., msbu_180601.sql.
2.4 Pray to your higher power or the Law of Large Numbers that you never need step 3.
3. Restoring the player table.
3.1 On the remote system the option for phpMyAdmin is located on the control panel. Click on the icon for phpMyAdmin on the line for your user ID.
3.2 You should then click on Databases.
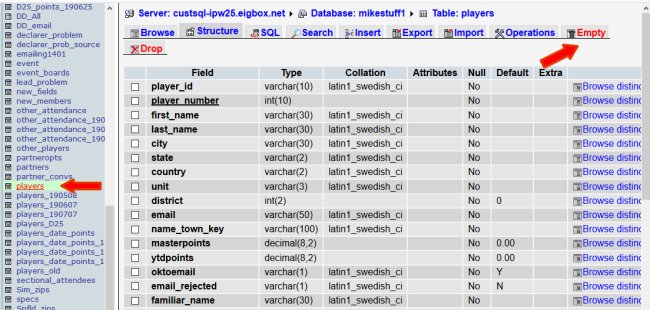
3.3 Click on the word "players" in the frame on the left that lists the tables and views in the database and then the “Import” button at the top of the screen.
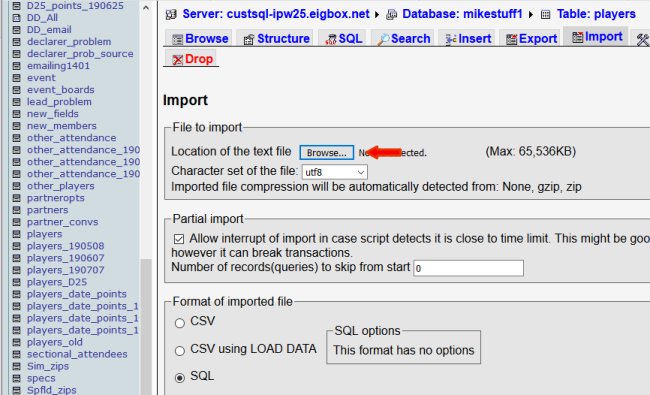
3.3.1 Click on the "Browse" button and select the file that you backed up.
3.3.2 No more advice. I have never had to select the above option. The update may time out or reach some other limit before the end of the file is reach. You may have to split the file of SQL statements into pieces.