

1. The Best in Class Award is a certificate given to one person in each of the fifteen categories used by the ACBL for the Mini-McKenney and Ace of Clubs award. It is based on total masterpoints won at events sponsored by District 25.
2. Standings in each category are updated after every event.
A. Obtain the results file file for the event from the ACBL and update the attendance and D25 points tables. This process is described here.
B. Update the page on the website that contains to the Best in Class results.
1) If this is the first tournament of the year:
a) Create a new page on the website for the standings. This process is described here.

b) On page 4 of the website fill in the year on the table associated with the Best in Class award. You may need to add a new row of years. Creating and editing tables on the web pages is described here. Make a note of the page number of this page.
c) Link the page that you created to the text for the new year in the cell in the table. Linking is described here.
2) If it is not the first tournament of the year:
a) Occasionally the ACBL will adjust a player's points. Very occasionally this will cause the player to be moved to a different category. The following steps are designed to deal with this phenomenon
b) Log on to the remote database and start phpMyAdmin. This process is described in steps 2.2 and 2.3 of the backup documentation.
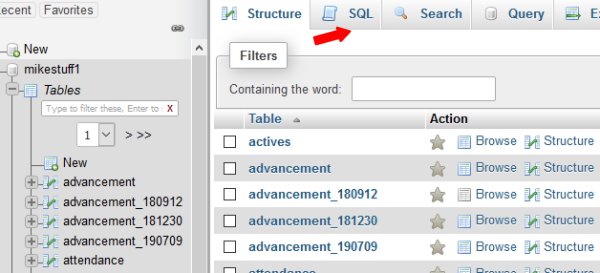
c) Click on the SQL button.
d) In a separate window open Bridge/District 25/Databases/scripts/D25_points.txt in a text editor.
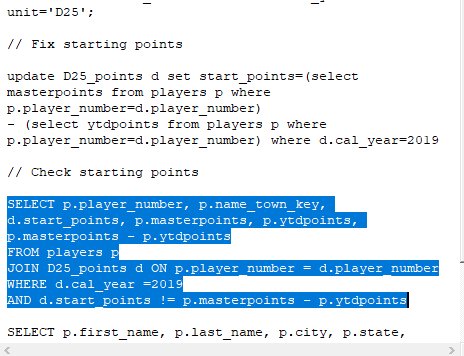
e) Find the text of the SQL query just below "// Check starting points." Make sure that the year after "d.cal_year=" is correct. If not, fix it.
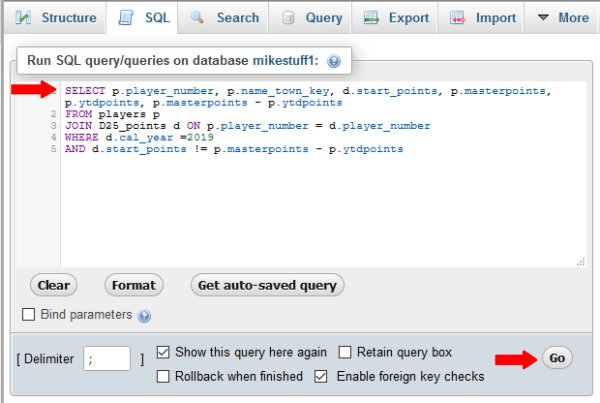
e) Select the seven lines of text starting with "SELECT", copy them using Ctrl C, and paste them using Ctrl V in the SQL box in phpMyAdmin. Click on the Go button to tun the query.
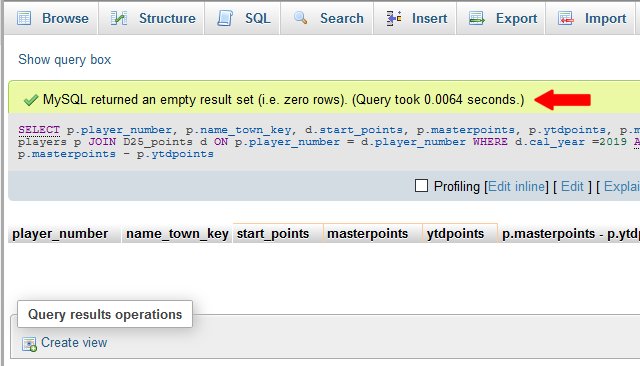
f) The query will take a few seconds. When it is done, it will either list records that have been changed by the ACBL, or it will say that "MySQL returned an empty result set" as displayed above.
g) If some records are listed:
1) Click on the SQL button again.
2) In the window of the text editor find the text of the SQL query just below "// Fix starting points." Make sure that the year after "d.cal_year=" is correct. If not, fix it.
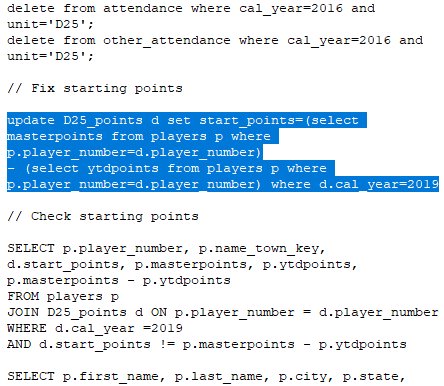
3) Select the five lines of text starting with "SELECT", copy them using Ctrl C, and paste them using Ctrl V in the SQL box in phpMyAdmin. Click on the Go button.
h) Run the SQL query for checking again using the above instructions. It should return an empty set. If so, the phpMyAdmin window can be closed.
3. Return to the D25 Database Menu in the browser.
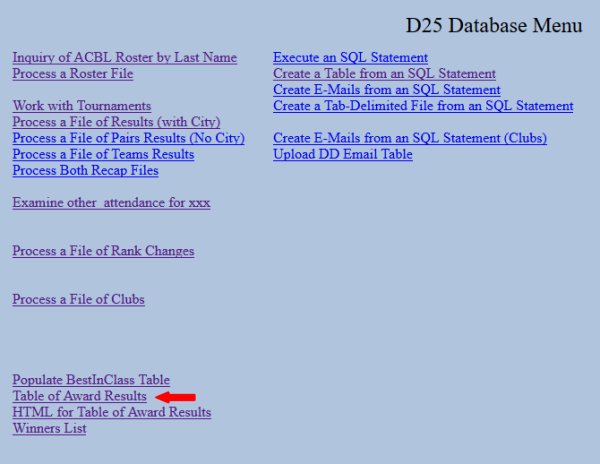
a) Fifteen leaders in each category are shown on both the website and the email. The first step is to check each category to see if there are ties for fifteenth. Select the option for "Table of Award Results."
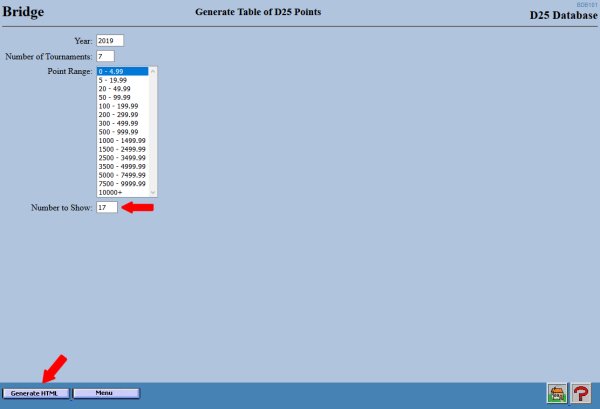
1) On Scr #DBD101 check the year, enter 17 for " Number to Show," and then click on "Generate HTML."
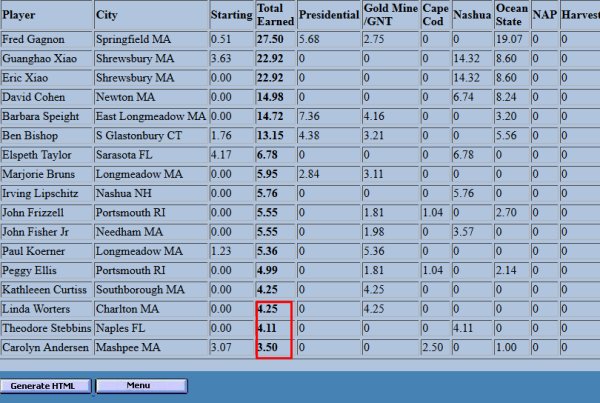
2) The seventeen leaders will appear. Look at the "Total Earned" for the last three.listed. If the fifteenth and sixteenth have the same values make a note that sixteen are needed for this category. If all three have the same value, not that seventeen are needed. This usually only happens with pairs that play only with each other. In the above example, two players have 4.25 points, but the sixteenth player has less. Therefore, there is no tie.
3) Repeat this process for the other fouteen categories. In the end you will have a list of the categories with ties. There may not be any. Click on the Menu button when you are done.
b) Pasting the HTML for each category into the webpage for the standings:
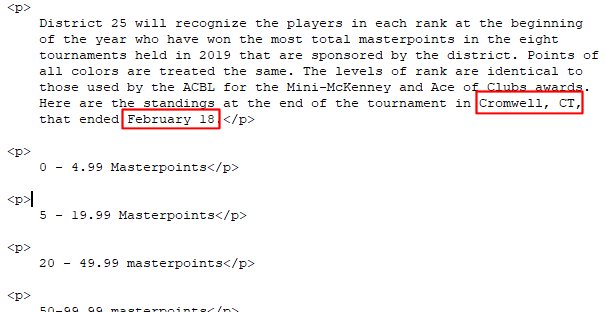
1) In a text editor open the text file named Bridge/District 25/Website/pages/BIC_Blank.txt. This file contains HTML code for the heading area and the outline of the results into which the individual tables are inserted. Check that the text at the top is accurate. If not, fix it and save it.
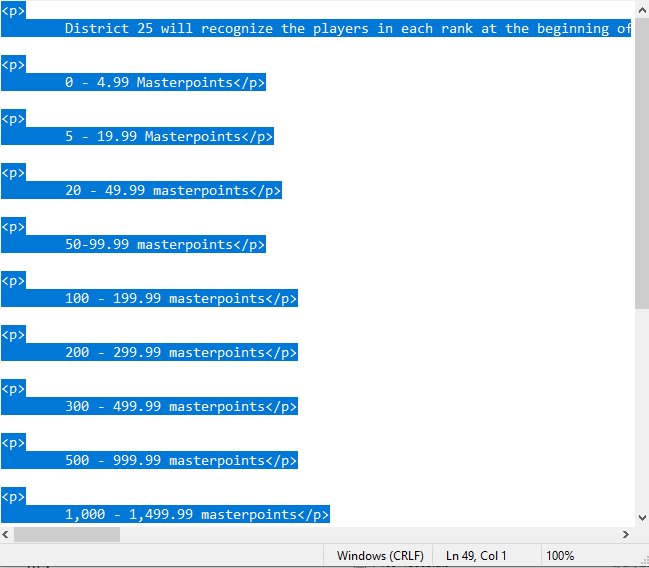
2) Select all the text and paste it into an empty page of a text editor.
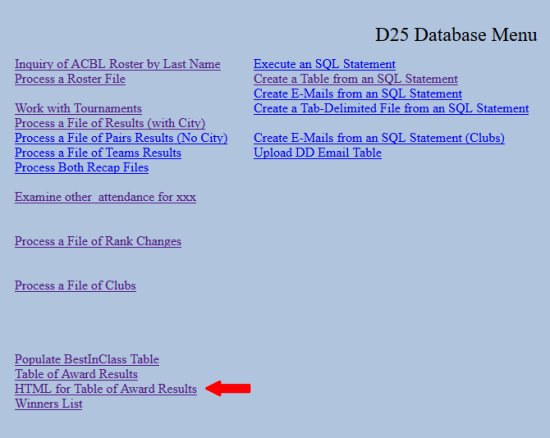
3) Return to the D25 Database Menu. Select the option for "HTML for Table of Award Results."
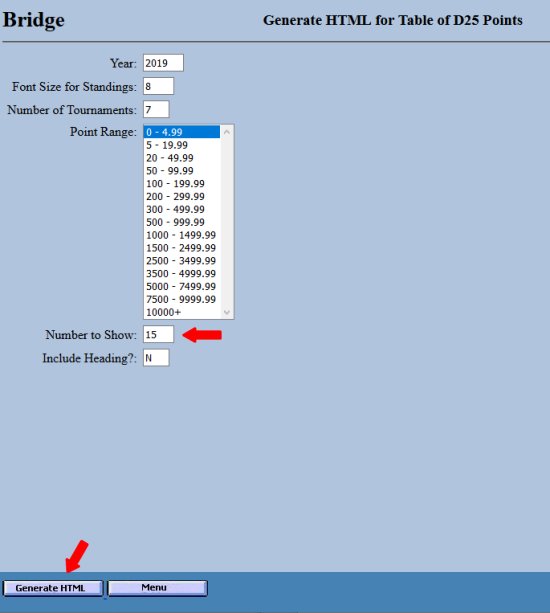
4) Select the first point range. If the category is on the list of ties, change the "Number to Show" to eliminate ties. Then click on "Generate HTML."
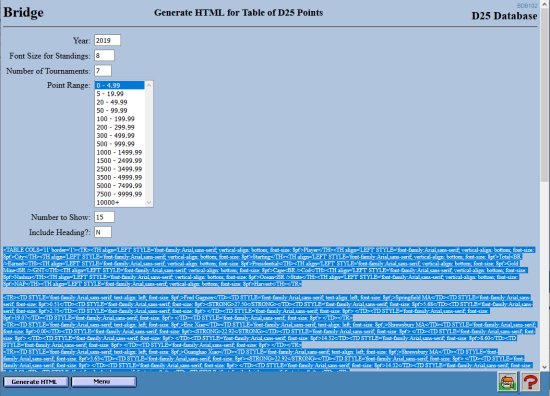
5) The HTML for that category will be displayed. Select everything below the "Include Heading?" line. Press Ctrl C to copy the HTML to the clipboard.
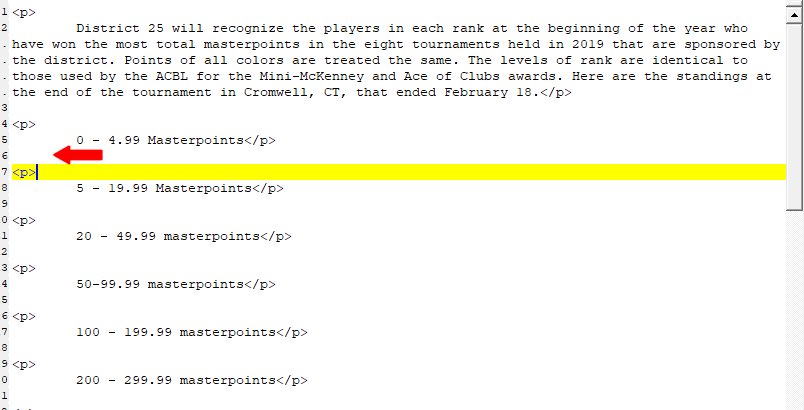
6) Return to the text editor that contains the HTML from BIC_Blank.txt. Place the cursor below the description of the category and press Ctrl V to paste the HTML.
7) Do not save! Repeat this process for the other fourteen categories. When you are finished, the HTML for the web page is complete. Select all of the text and press Ctrl C to copy it to the clipboard.
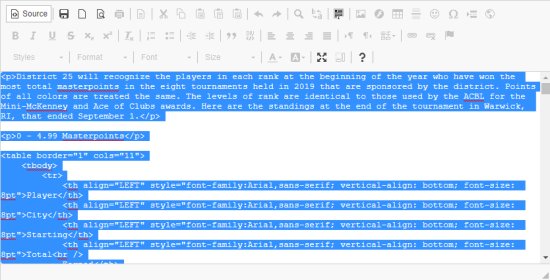
8) In the website editor select the blank page that was created in step 2b1)a). You can obtain the page number from the links to the page that should be on from both p. 1 and p. 4 of NEBridge.org. Click on the Source button. Select all of the text. Then press Ctrl V to insert the HTML from the text editor. Do not save yet.
9) Click on Source to return to the WYSIWYG editor. Check all of the following:
(a) The header text shows the correct tournament.
(b) For each category the starting points in the table must agree with the description.
(c) Make sure that all of the ties are included.
10) If there are any mistakes, it might be easier to correct them in the text editor than in the website editor.
11) When there are no more mistakes, save the webpage. Post a notice on the main page of NEBridge.org that the standings have been updated.
C. Sending the emails.
1. Make a backup copy of the BestInClass table on the remote server. Instructions for this can be found here.
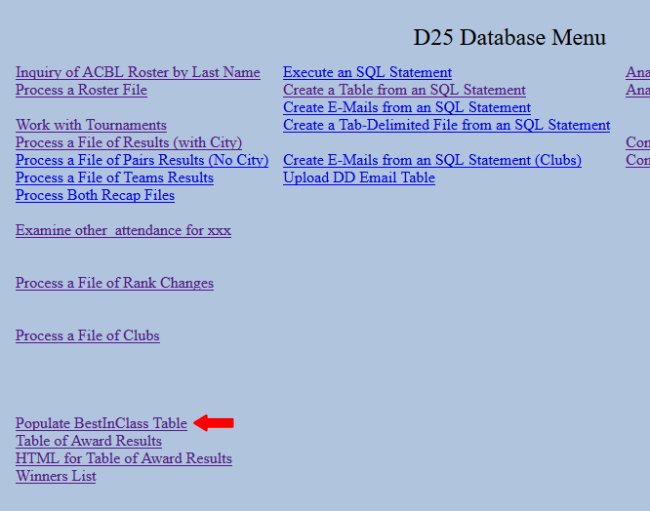
2. On the D25 Database Menu on the remote system select the option "Populate BestInClass" table. This table has all the fields needed to send the emails.
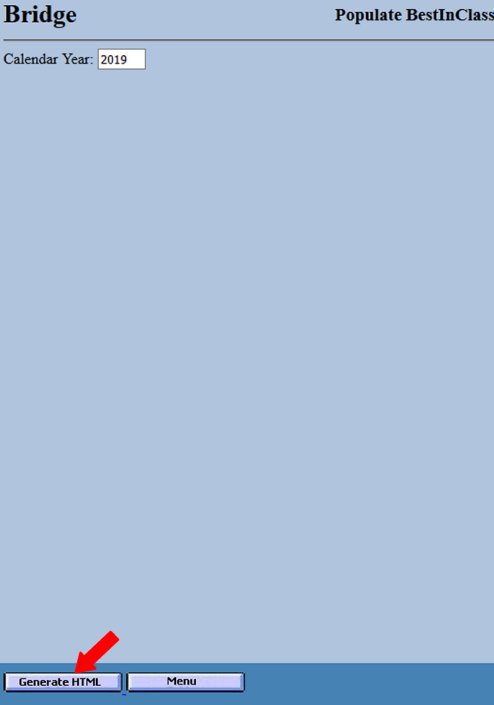
2. On Screen #DB100 check that the year is correct and then click on "Generate HTML."
3. Export the table to the local system as a csv file.
a) Log on to the remote database and start phpMyAdmin. This process is described in steps 2.2 and 2.3 of the backup documentation.
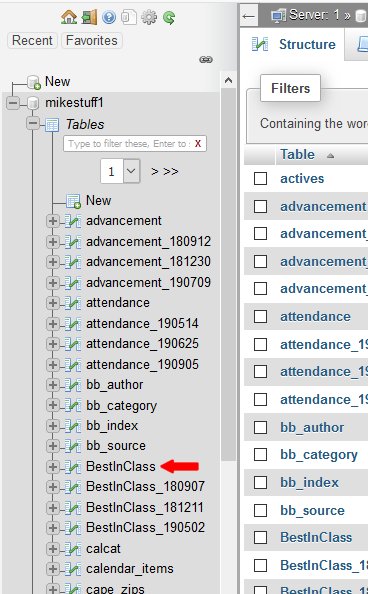
b) Click on the BestInClass table in the list of tables on the left. If the list does not appear, click on mikestuff1 first.
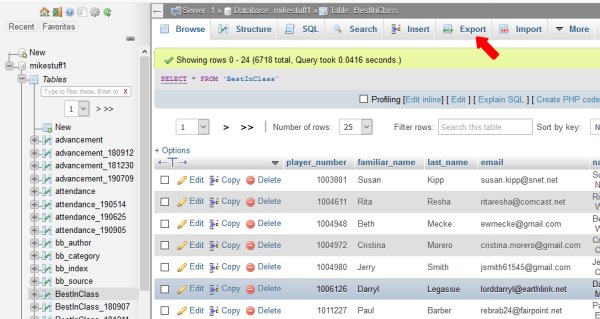
c) Click on the Export button at the top of the page.
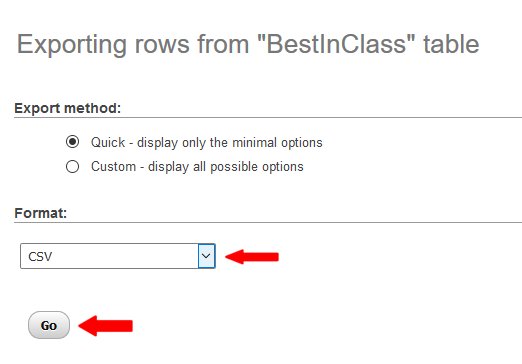
d) Click on the radio button for Quick and select CSV (NOT CSV for MS Excel, which uses semi-colons as field delimiters) from the pull-down window. Then click on the Go button.
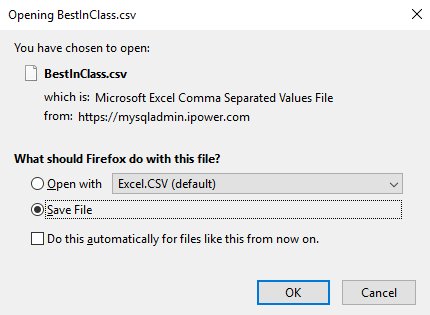
e) You can open the file if you have the Excel software, or you can save it without clicking by selecting the "Save File" radio button. Then click on OK.

f) If you saved the file, it will be downloaded by the browser. In Firefox you must click on the download arrow at the top of the screen and then click on the folder icon to open the download folder. Other browsers may behave differently.
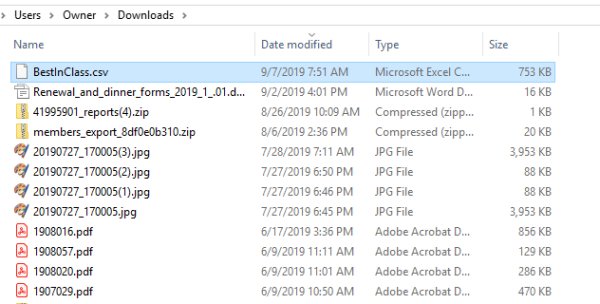
g) Find the file named BestInClass.csv. It will probably be at the top of the list. Change the name to something reminiscent of the tournament, such as Warwick.csv. Then select the file and press Ctrl C to copy it to the clipboard.
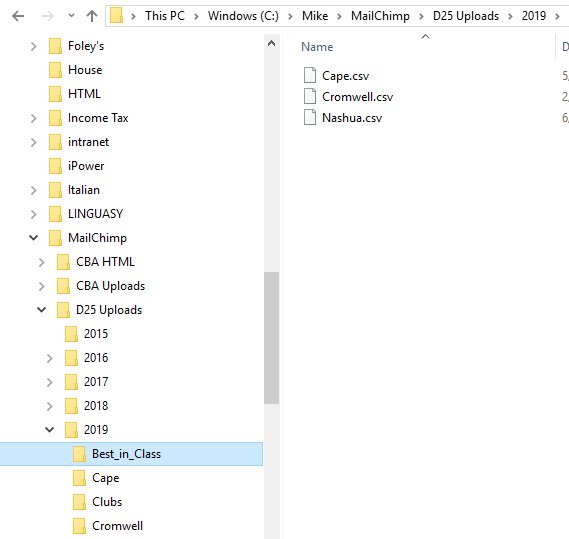
h) There should be a subfolder named Best_in_Class (or something similar) in the folder that you created for the year inside MailChimp/D25 Uploads. If it does not exist, create it. Select it and then press Ctrl V to paste the file there.
i) If you have not done so already, open the file to make sure that it looks like a valid csv file.
4. Update the list in MailChimp.
a) Sign on to the Audience section of MailChimp. This process is described here.
b) Update the list named BestInClass using the process described here.
5. Create the emails for MailChimp. The basic process is described here.
a) A separate email must be created for each category.
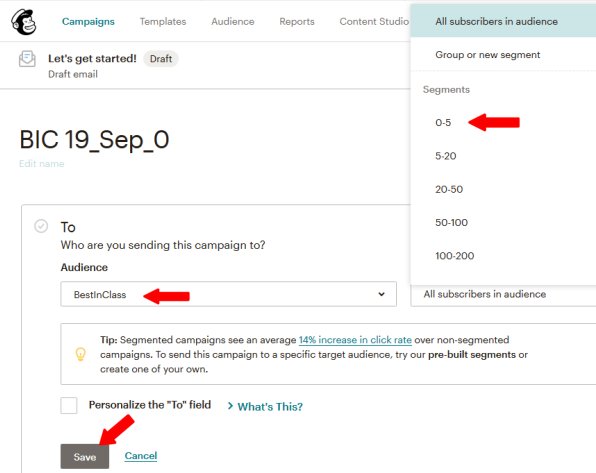
b) The BestInClassAudience is used for each category, but separate "segments" have been defined for each category. After you have entered the name of the campaign, a screen appears for all of the subsequent steps. The first step is defining the recipients. Use the pulldown menu on the left to select the BestInClass audience and the pulldown menu on the right eo select the segment for the first category to which you want to send. Then click on the Save button.
c) In most ways the rest of the process is the same as for any other email. One aspect of the composition of the emails is quite different. Each email contains two tables. The list of tournaments is the same for all fifteen categories, but the list of the leaders is different for each category.
d) Create a folder for the tournament within the Best in Class folder for the year in MailChimp/HTML.
e) Copy the HTML file named 0.html from a previous tournament into the folder for this tournament.
f) Load the HTML text into a text editor. Modify the text as appropriate. Make sure that the lis of tournaments is accurate.

g) On the D25 Database Menu of the remote server select the option "HTML for Table of Award Results" as above.

h) Select the first category as above and change the Number to Show if this category is on your list of ones with ties..
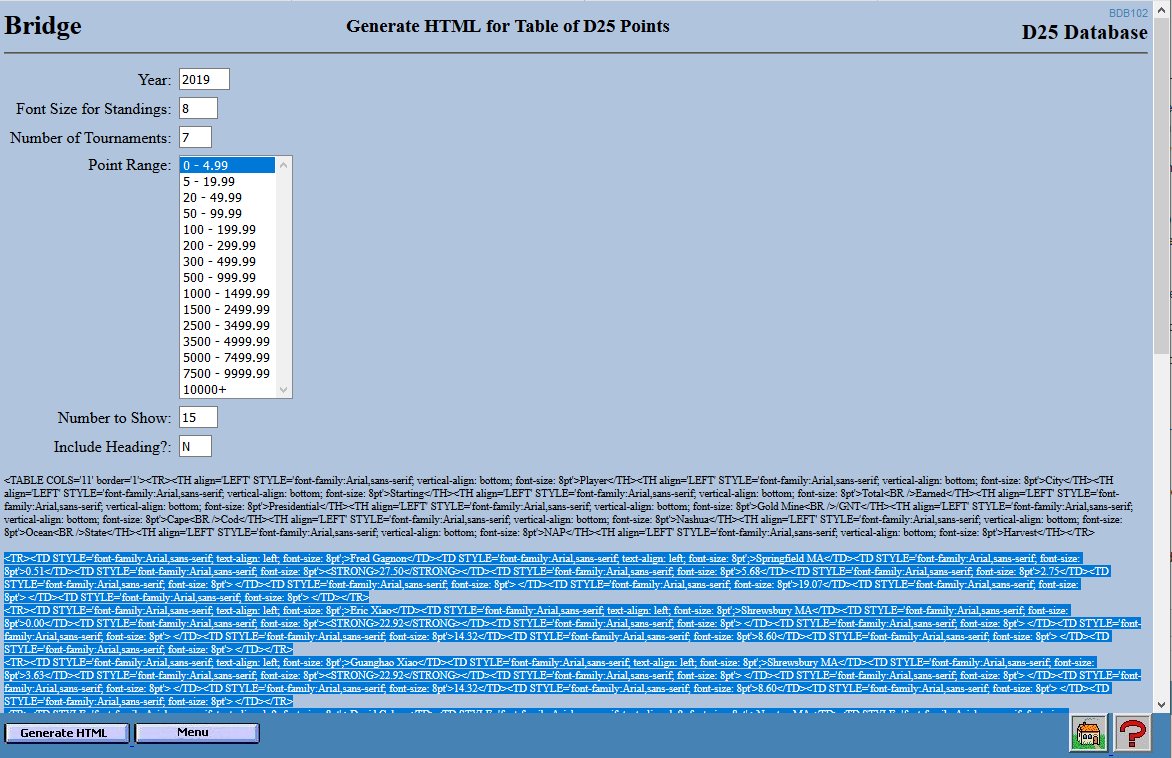
i) Select all of the text starting with the line below the first empty line and ending with the line fefore the second empty line. Leave out the sections that begin with <TABLE and </TABLE. Press Ctrl C to copy it into the clipboard.
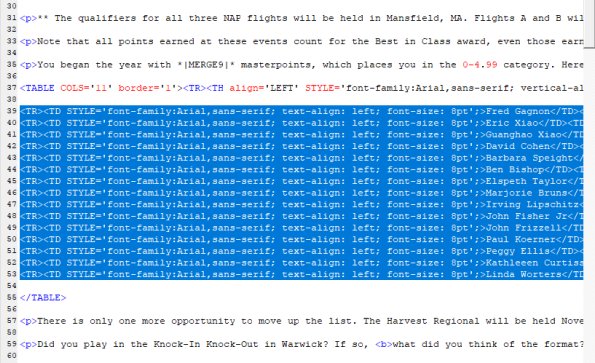
j) In the text editor in which the HTML for the email is loaded select the code for the list of players. These are the fifteen or so lines that begin with <TR><TD> and are right below the line that starts with <TABLE COLS='11'. This is much easier to do if the word wrap feature is turned off.
k) Press Ctrl V to paste the list from BDB102. It should have replaced the previous text.
l) Check all of the following:
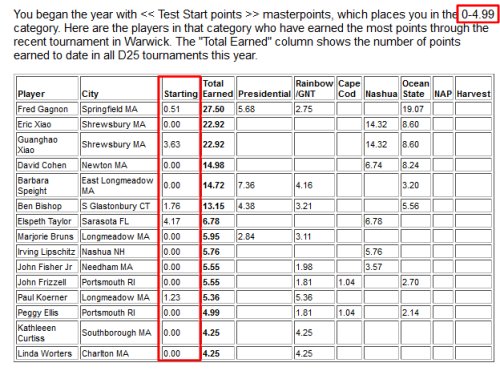
(1) The masterpoint category listed in the text agrees with the table of leaders.
(2) Make sure that the correct number of leaders is displayed. It is easy to leave off one or two while selecting.
(3) Check the text carefully. Make sure that all the dates and other details are correct.
(4) The HTML editor no longer has a spelling checker. However, you can copy all of the text and paste it into a word processor to check the spelling.
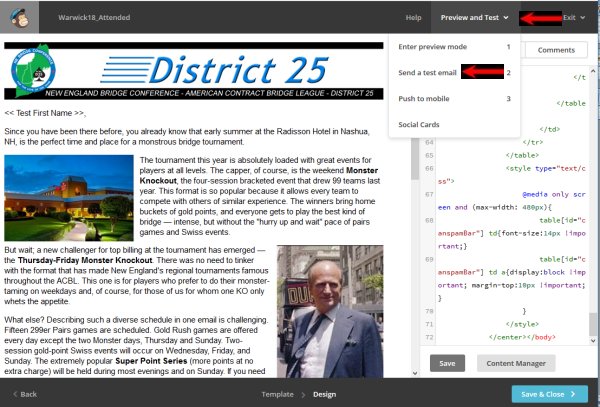
m) Use the pull-down menu next to "Preview" to send a test email to yourself.
(1) Check the text carefully, If possible, get someone else to proof read it.
(2) Make sure that the images appear.
(3) Test every link.
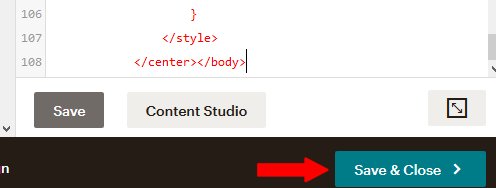
n) When everything has been checked, click on the Save and Close button in the lower right.
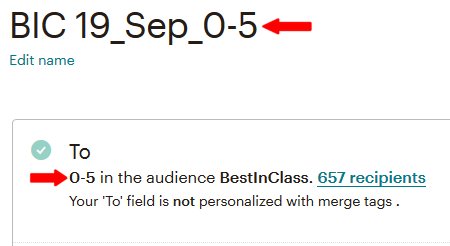
(1) Make very certain that the selection of people to receive the email was correct.
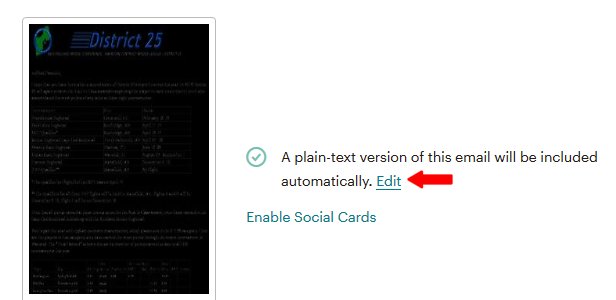
(2) Edit the text-only email so that it looks presentable.

(3) Click on the Send button in the upper right. Then click on the Send button on the screen that feature the sweating chimpanzee.
o) Repeat this for the other fourteen categories.This can become quite tedious. It might help to take a break after every four or five categories.
