

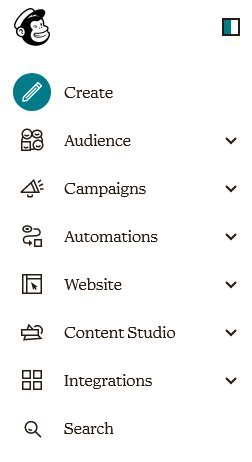
1. To update a list that has already been created and populated, begin by going to the “Audience” page by clicking on the word “Audience” on the "dashboard" that appears on the left side of almost every web page in the MailChimp system
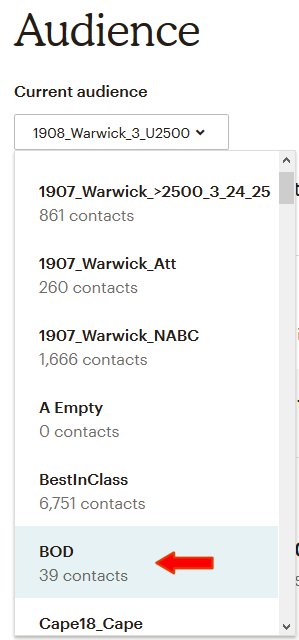
2. The currently defined set of lists appears arranged in alphabetical order with numbers before letters. Find the list that you want to update. Select it by clicking on the name.

2.1 If the list of contacts is not displayed, click on the "View Contacts" button on the right side of the screen.
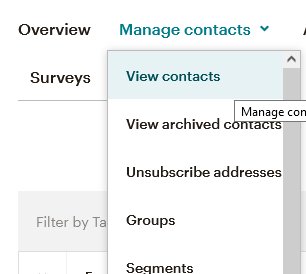
2.1.1 If this button is not on the screen, look for the phrase "Manage Contacts" with a downward pointing arrow indicating a pull-down menu.
2.1.2 Click on the downward pointing arrow and then click on "View Contacts".
2.2 The current list of contacts is displayed.
3. Updating can be done in two ways.
3.1 If there are only a few changes, you can remove obsolete contacts from the list, edit fields, and/or add new records.
3.1.1 To remove an obsolete contact from the list:
3.1.1.1 Find them on the list.
3.1.1.1.1 There is no search feature. The easiest way to find an individual record might involve using a one-record segment. This technique is described here.
3.1.1.1.2 The alternative is to sort the list. You can change the primary sort by clicking on a column heading. There is no way to establish a secondary sort. So, you sort the list by last name, but you cannot specify that the records be sorted by last name and then first name.
3.1.1.1.3 There may be more than one page.

3.1.1.1.3.1 You can change the number of contacts displayed by clicking on the down-arrow at the bottom of the page on the left next to the word “View.” The most that you can see at once is 100.

3.1.1.1.2.2 The widget that allows you to navigate between pages is displayed at both the top and bottom of the list on the right.

3.1.1.2 Click on the box to the left of the email address that you want to remove from the list. A checkmark will appear.
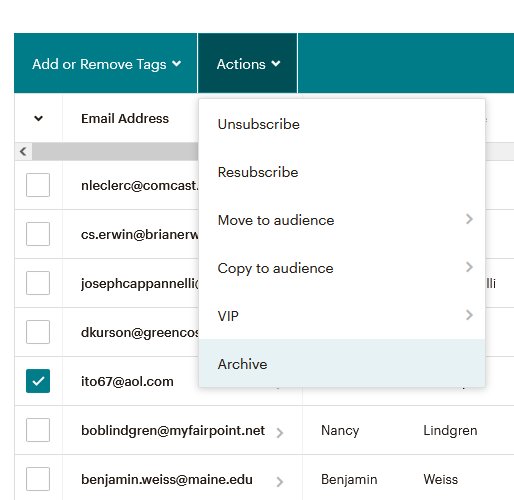
3.1.1.3 On the blue-green line above the column headings is a down-pointing arrowhead nex to the word "Actions." Click on it and then select "Archive" if the person is deceased or will definitely never be on this list in the future. If it is possible that he/she will return to the list, select "Unsubscribe" instead.
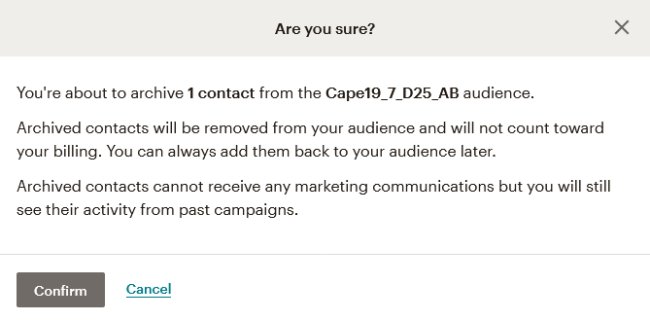
3.1.1.3 On the “Are you sure?” window click on the Confirm button if you are certain that the person will never again be on this list. If you are doubtful, click on Cancel and then unsubscribe them
3.1.2 To add a new contact:
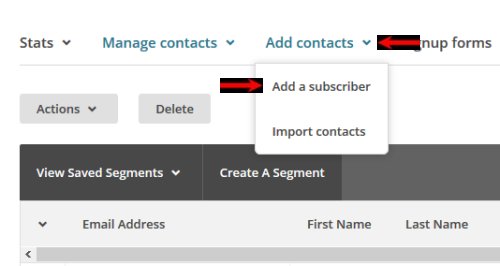
3.1.2.1 Click on the down-pointing arrowhead to the right of the phrase “Add contacts” at the top of the screen.
3.1.2.2 On the pull-down menu click on “Add a subscriber.”
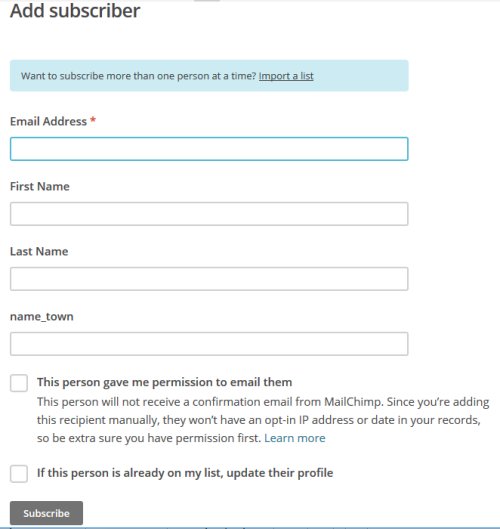
3.1.2.3 The “Add subscriber” screen now has many more fields than shown above, but the four shown are the only ones used on most lists.
3.1.2.3.1 Fill in all of the fields.
3.1.2.3.2 Check the two boxes.
3.1.2.3.3 Click on “Subscribe” at the bottom.
3.2 If you wish to replace all contacts on a list with ones on the database or a .csv file, you should follow the instructions posted here. You should read the parts about selecting audiences. The actions needed start with step #2.6.
