

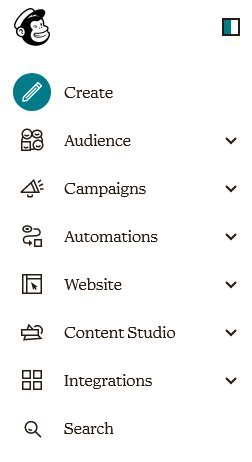
1. To create a new list (or to do anything that has to do with lists), you must be in the Audience section of MailChimp. If you are not there, begin by clicking on the word “Audience” on the menu that appears on the left side of nearly every page.
1.1 At one time it was very easy to create a new list. Five or more were created for every tournament. This changed in 2019 when MailChimp put a limit on the number of lists that the district's account could have. The limit was much lower than the number already created. Fortunately, because our account was "grandfathered in", we were not required to delete any existing lists.
1.2 It is now necessary to reuse and rename existing lists. Lists should almost never be deleted, regardless of how worthless they seem. New ones to replace them will not be allowed under the existing contract with MailChimp. The entire process is now:
1.2.1 Find a list from a previous year that promotes a tournament and is unlikely to be needed. There should be many that meet this criteria.
1.2.2 Remove all contacts on the list that you selected by archiving them.
1.2.3 Change the name and other details about the list. Unfortunately, you will not be allowed to change the Creation Date, which is often used for sorting.
1.2.4 Upload the contacts to the list named "000 Do not delete." Do not try to import them directly into the list you just renamed.
1.2.5 Select all of the contacts in the 000 list and move them to the new list.
2. Finding a suitable list to reuse:
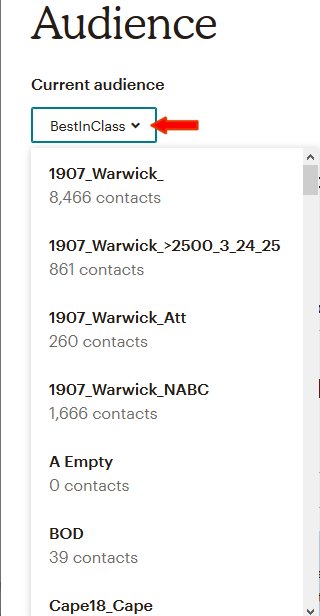
2.1 On the left side of the main Audience page is a pull-down menu for display of all lists. It is in a box that has the name of the last-used menu and a downward pointing arrowhead (the indication of a pull-down menu). When you click on the arrowhead, a window containing all current lists will appear. The lists are in alphabetical order with numbers before letters.
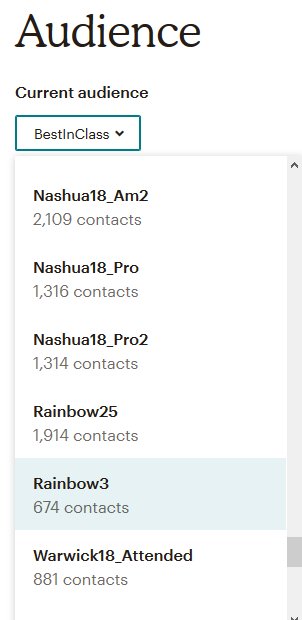
2.2 Use the slidebar to navigate through the lists. The ones from before July, 2019, start with the site name or event name; subsequent ones begin with the two-digit year number. Click on one that can be safely reused. It will become the "Current audience."
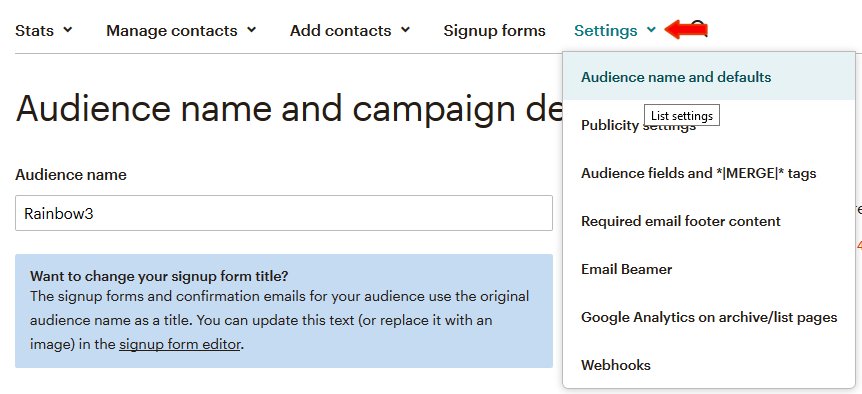
2.3 Click on the down-pointing arrowhead next to the word "Settings." A list of options will appear. Click on "Audience name and defaults."

2.3.1The very first field on the "Audience name and campaign defaults" page is for the "Audience name." Type over what is there with an appropriate name. The format currently used is YYMM_Tournament_Wks_Selection, where YY is the last two digits of the year, and MM is the month number. So ,"1908_Warwick_3_U2500" refers to the list made in August, 2019, sent three weeks before the Warwick tournament to players with under 2500 masterpoints. Because it would not be meaningful to most people, MailChimp considers this a "bad" name, but this naming convention guarantees that the lists for tournaments will be in date order. Also, why would we care what a chimpanzee thinks? And his hat is stupid.
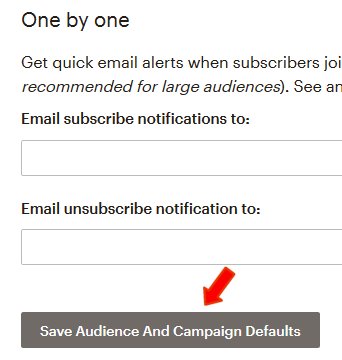
2.3.2 Review the rest of the entries on this page and fix any that are inappropriate. Then click on the "Save Audience And Campaign Defaults" button. It is at the very bottom of the web page.
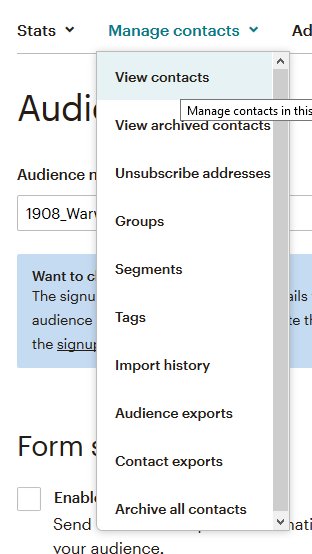
2.4 If the contacts for this list are not shown, click on the down-pointing arrowhead next to "Manage contact" and select "View contacts."
2.5 Make sure that there is a column called "name_town" and any other field that is needed on the new list. If not, create one or change the name of an existing column to "name_town." The instructions are here. Note: First Name, Last Name, and Email Address are on every list.
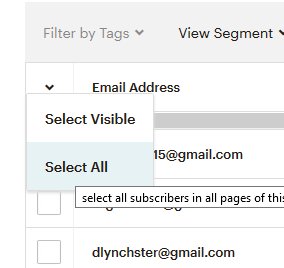
2.6 The contacts should now be listed. Click on the down-pointing arrowhead that is above the checkbox column. It is to the left of "Email Address." Click on "Select All." This will place a checkmark in the checkbox for every contact on the list.
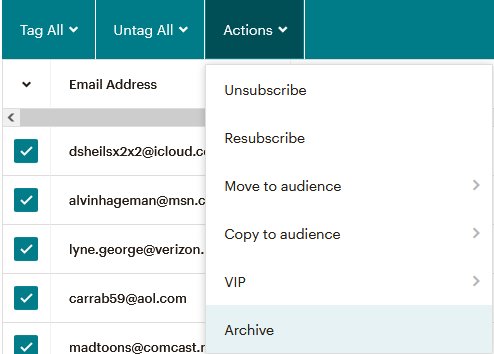
2.7 Click on the down-pointing arrowhead next to Actions in the blue-green line and select "Archive".
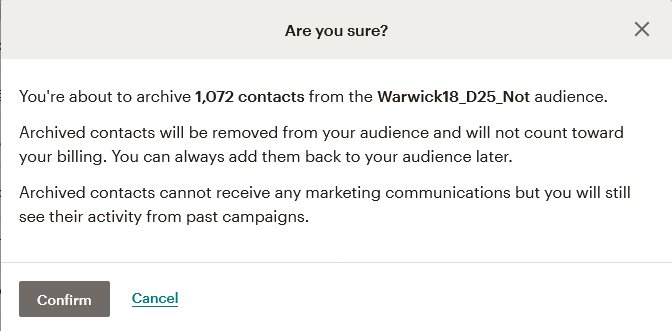
2.8 The above window will appear. If you are sure that you did not make a mistake, click on the "Confirm" button.

2.9 The contacts are not immediately archived. Wait a minute or two and then press F5 to reload the page. Eventually the number of contacts should be very small, and the number of subscribers will be 0.The ones that are still there have bad email addresses. Nothing can be done about them, but they won't affect the email process. They have a status of "cleansed".
3. The next step is to populate the list with contacts. For reasons that are too bizarre to explain, the new list cannot be populated directly. Instead, contacts must be downloaded to an empty list named "000 Do not delete."
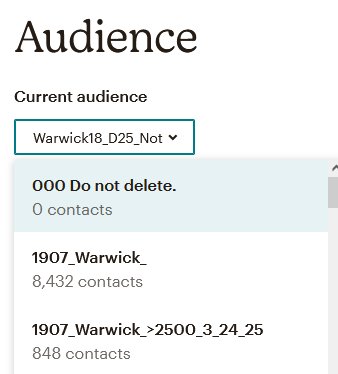
3.1 Follow the instructions in steps 2.1 and 2.2 above, but this time select the 000 list.

3.2 An empty contact list will appear. Click on the down-pointing arrowhead to the right of “Add contacts.” Then click on “Import contacts.”
3.3 The next step requires a .csv file on the local system with fields (columns) for First Name, Last Name, Email Address, and name-town. You may want more columns. The file must have a row for each contact. Spreadsheets can be saved as .csv files. Database files can be exported as .csv files.
3.3.1 The process of creating a .csv file using MySQL is explained here.
3.3.2 The process used to populate the file used for the Best In Class mailings is different. It is explained here.
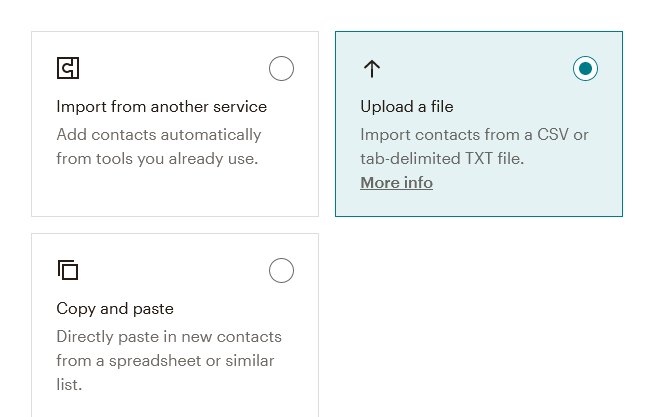
3.4 Click on the radio button labeled "Upload a file."
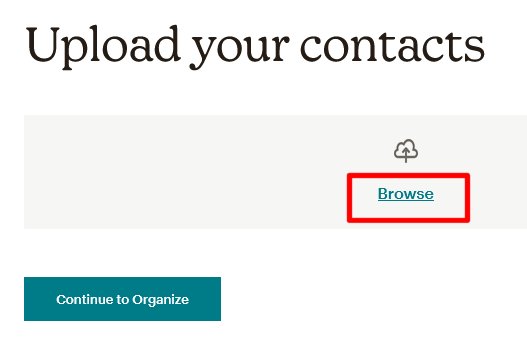
3.5 Click on the "Browse" button."
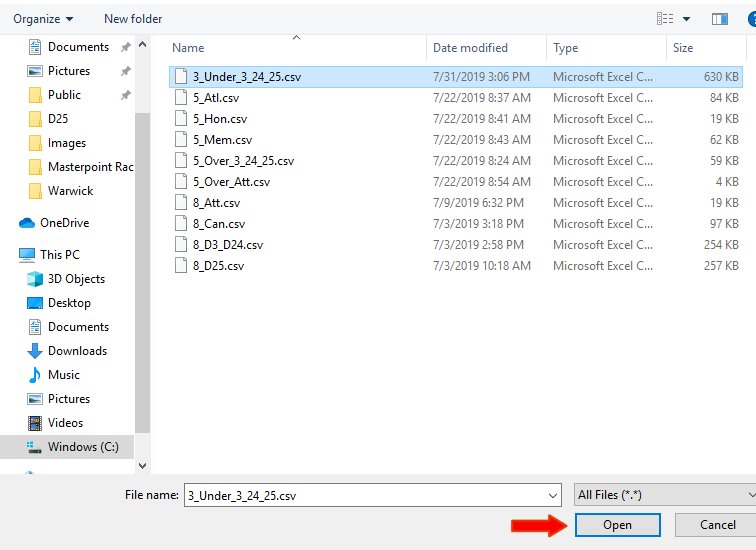
3.6 Above is the window for specifying the file on the local system that should be imported to MailChimp. Find and select the file that you created from the database. The file type extension will be cvs. Then click on the "Open" button.
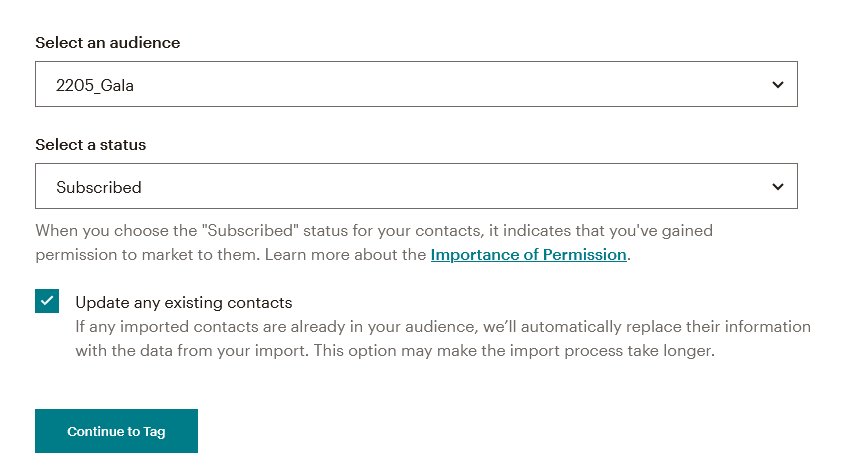
3.7 The "Organize your contacts screen" appears after you specify the file. The status should always be "Subscribed". Since there are no contacts in the 000 audience yet, it does not matter whether you click the checkbox for "Update any existing contacts?" Click on the "Continue to Tag" button.
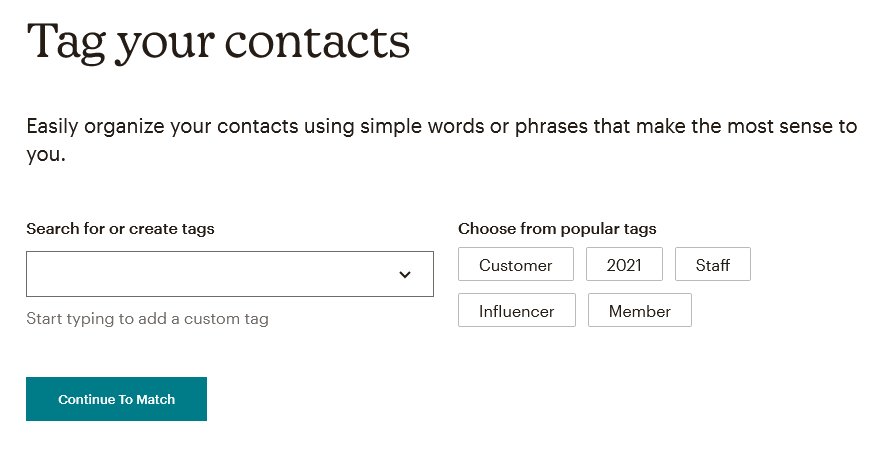
3.8 Fill in a tag if you wish. The use of tags is not documented in these instruction. Click on the "Continue to Match" button when your are ready.
3.9 MailChimp uploads the CSV file and displays the first few records as columns. The next step is to name each column. The choices are Email Address, First Name, Last Name, Address, and Phone Number. You can also supply your own name. The file that we imported has four fields, which MailChimp displays as four columns. We will select names for all four columns. It is also allowed to define a new name, but this is seldom necessary.
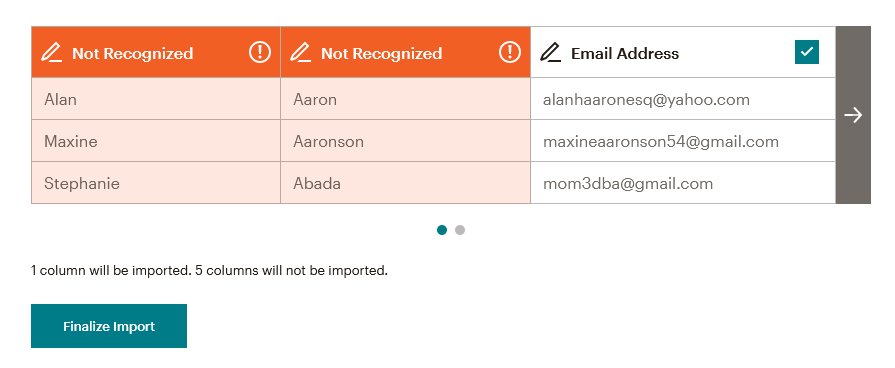
3.9.1 MailChimp displays the first three rows on the file. It can recognize the Email Address, but you must tell it what fields on the list are associated with the other columns. The first column in most cases is the database's familiar_name field. Click on "Not Recognized" in that column.

3.9.2. The list of fields will appear if you click on the downward pointing arrow. Click on the appropriate field name and then the "Confirm" button. Follow the same process for the second column, which is the "Last Name."
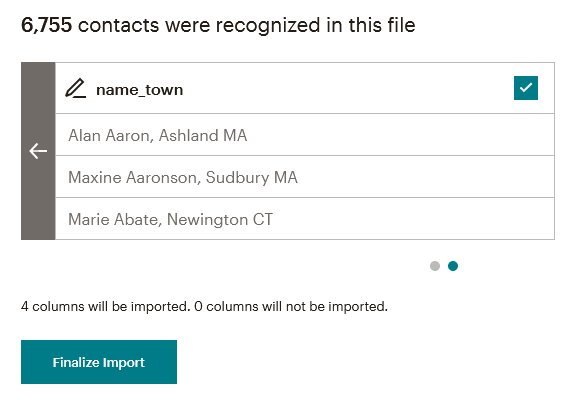
3.9.3 The fourth field is usually the name_town_key field on the database. It is ordinarily called name_town on MailChimp audiences. Select it from the pull-down menu. After you have done so, the message displayed should say that "0 columns will not be imported." If this does not happen, look through the fields to figure out which one(s) were not identified and fix them. When all columns have been matched, click on "Finalize Import."
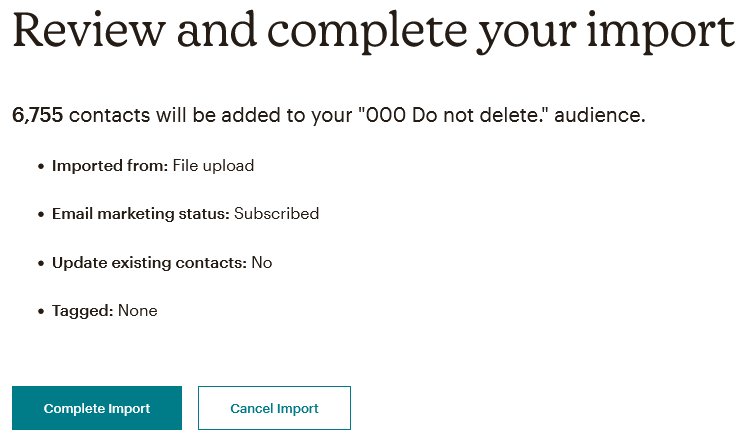
3.9.4 This screen summarizes the previous entries. If everything is OK, just click on the " Complete Import" button in the lower right. The new list will be created and displayed. While this is being done, you can navigate to a different page if you wish.
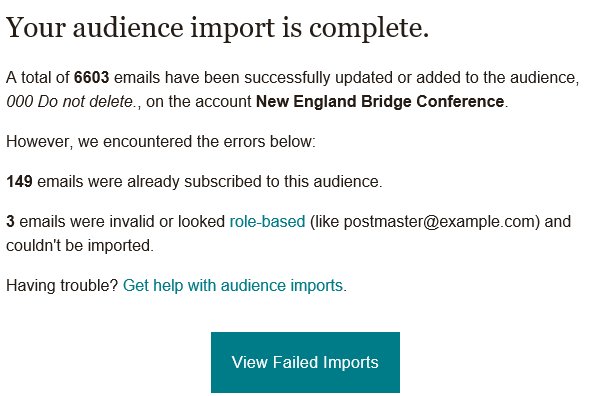
3.10 An email similar to the above will be sent to you. The "already subscribed" ones are probably attributable to two players who had the same email address. MailChimp uploaded one of them and then did not update the second because it would be a duplicate. An audience cannot contain two contacts with the same email address. The ones that were "invalid or looked role-based" were probably "cleansed" and then deleted or archived at some time. As long as the total is only a small percentage of the total, neither of these is usually worth investigating. If you want to check them out, click on the "View Failed Imports" button. The result, unfortunately is one long string of emails and names.
4. The last step is to move all of the contacts from 000 to the list that was redefined and emptied in step #1.
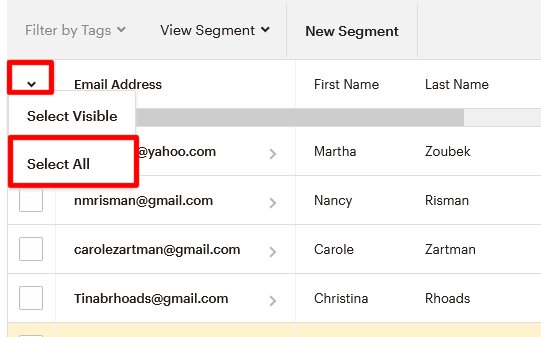
4.1 It will take MailChimp a few minutes to import the contacts. When the process is completed, the number of contacts will be updated, and a list of them will be provided. Select all contacts in the same way as described in step 2.4 above.
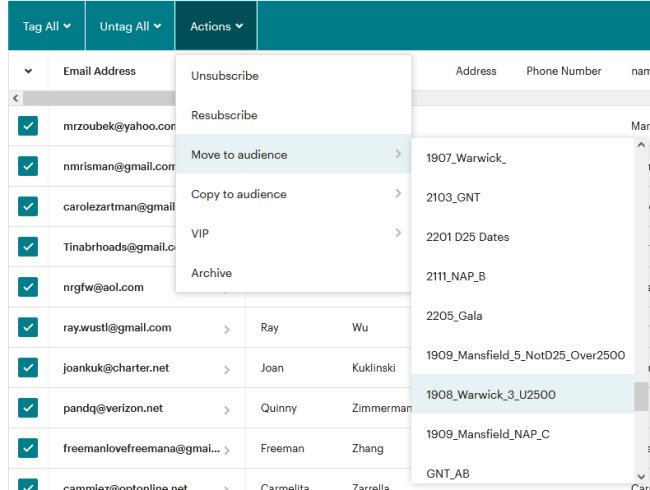
4.2 The boxes to the left of each contact should now be checked. Click on the down-pointing arrow next to the word "Actions." Select "Move to audience." Then find the name of the audience defined in step 1 and click on it. The audiences are listed by creation date, which, unfortunately, is no longer meaningful to District 25.
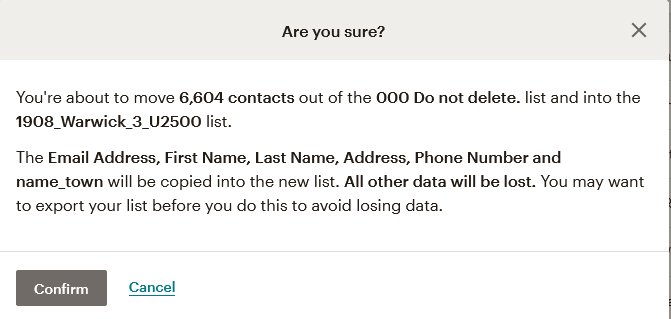
4.2 A window will appear asking you to confirm that the contacts should be moved. Four columns should be listed: Email Address, First Name, Last Name, and name_town. If name_town is missing, press Cancel and add it to the new list. Instructions are here. If name_town is listed, click on the Confirm button.
4.3 It will take a few minutes to move all the contact information. Check the new list to make sure that it has the expected number of contacts. There may be some who are not subscribers. They are left over from the list's previous use. They are inconsequential. The 000 list should have 0 contacts after the move is completed.
