

1. To send an email, you need a list of contacts, which in MailChimp is called an audience. A description of the processes of creating and maintaining audiences can be found here.
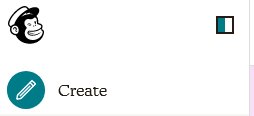
2. If the audience and any necessary segments have already been created, you can begin the process of creating an email by clicking on the “Create” option that is at the top of the menu column that appears on nearly every page on the MailChimp website. Blue buttons with the words "Create Campaign" also appear on some other pages. They link to the same page. There are also other more circuitous routes to arrive at the same place.
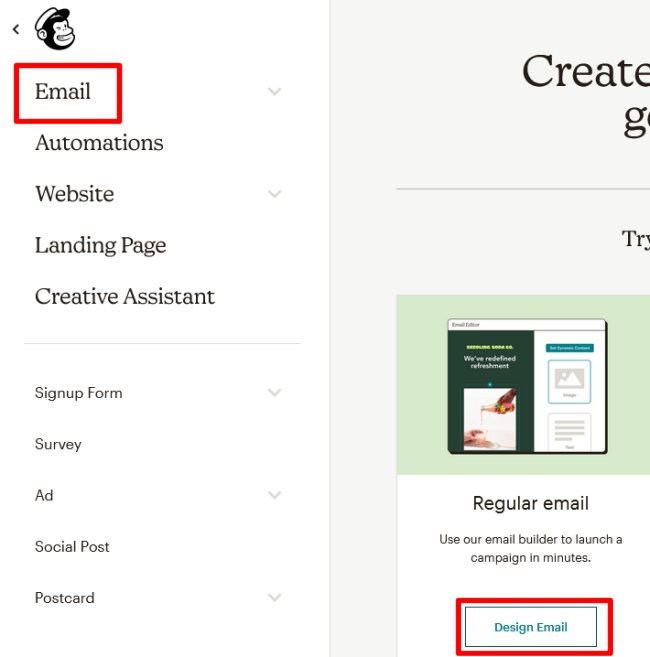
3. On the next screen that appears click on the word “Email” that appears in the column on the left. It is actually a pull-down menu, which is what the very light grey downward pointing arrowhead indicates. The right side of this web page is used by MailChimp to promote various services and products that it provides. If there is a button on this page that says "Design Email", it will perform the same function and, in fact, obviate the need for the next step..
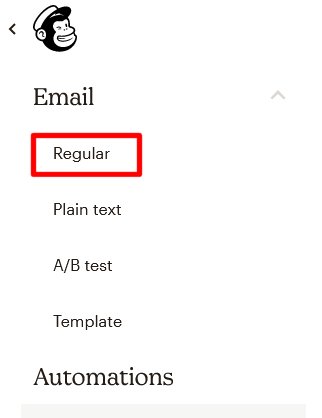
3.1 The only kind of Email that the district uses is "regular". Click on that word.
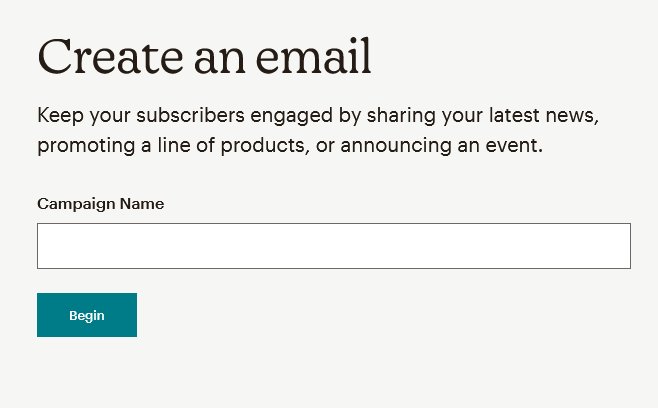
3.2 On the “Create an Email” screen enter a name for the email (sometimes called a "campaign" in MailChimp). It can be the same as the name of the audience or the segment of the audience, but it should not be the same as the name of any other email. Click on “Begin” when you are satisfied with the name.
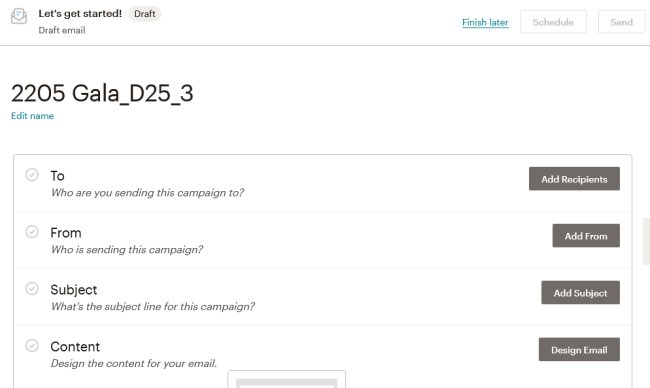
3.3 This page is the home screen for working on an email.
3.3.1The right side of the top line allows you to stop working by clicking on the words "Finish later".
3.3.2 When the email has been designed and validated, the Send button on the far right side of the top line can be used to send it out to all of the designated recipients. If any required steps have not yet been accomplished (as on the above sample), the Save button is greyed out and not usable.
3.3.3 If the name of the email is missing or needs to be changed, click on the words "Edit name" to fix it. If you leave the name blank, MailChimp will fill it in with the Subject line. This might cause confusion.
3.3.4 After each of the steps has been completed. the dark grey buttons on the right turn light grey. If the name is OK, start by clicking on the "Add Recipients" button.
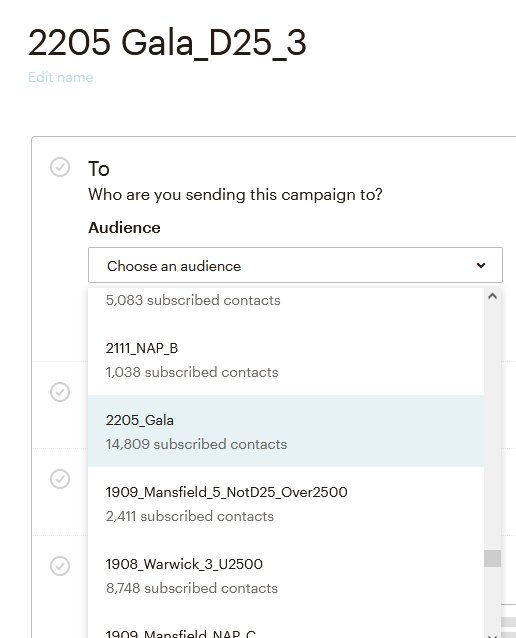
4. When you click on “the “Add Recipients” button, the above screen will appear for you to specify the audience. Click on the down-pointing arrowhead on the box below the word "Audience," which is what MailChimp calls lists. Then scroll through the very long list and click on your audience.
One of the most annoying things about the MailChimp program is that the audiences displayed are in no discernible order. This problem has been reported to MailChimp, but the company did not commit to addressing it, presumably because most users have very few audiences,
The incorrect usage of the word "Who" in the question at the top was not reported to MailChimp. Feel free to do so if you have a lot of time on your hands.
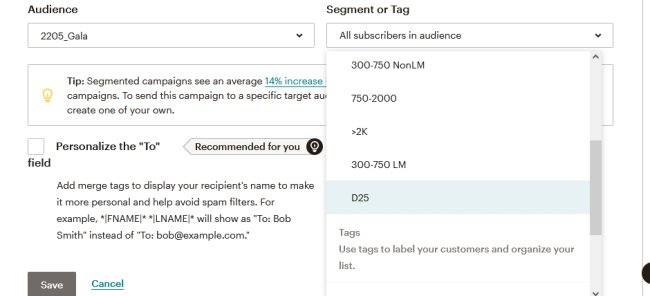
4.1 If the audience has been segmented (instructions here), a new pull-down menu to the right of the audience will allow you to select the appropriate segment of the audience. In this case the segment named D25 represents all of the contacts in the audience from District 25.
The list of segments is also in no discernible order. The coder who worked on this page evidently did not know how to specify a sorting order to a pull-down list. It's not difficult.
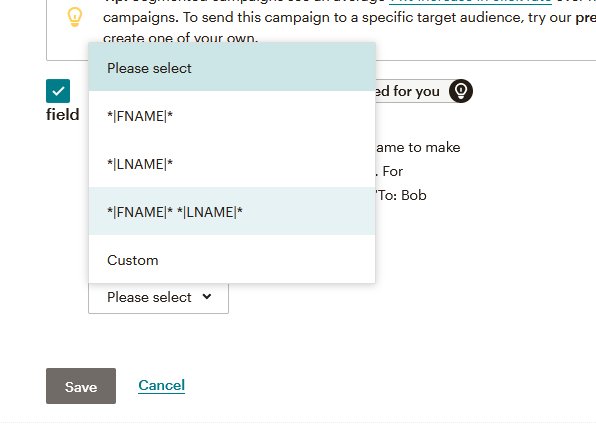
4.2 It is a good idea to click on the checkbox with the label 'Personalize the "To"'. Then select the option shown above. MailChimp claims that this reduces the chance of a mail server labeling the email as spam or anything else. It would be nice if a default value could be stored as a setting on the audience table so that this did not need to be specified every time, but this has not been reported to MailChimp.
You can then click on the "Save" button.
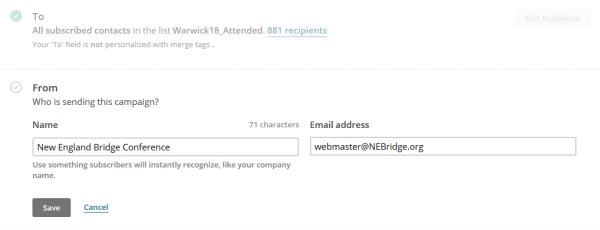
5. The above screen appears when you click on the “Add From” button on the email home screen, but it is almost never necessary to do so. The information displayed is inherited from the definition of the audience. If you changed either field, click on the “Save” button.
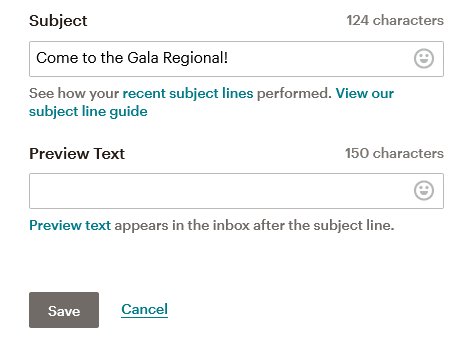
6. The above screen appears when you click on the “Add Subject” button on the Email home screen. The “Subject” is required; the “Preview text” is not. Click on the “Save” button when you are satisfied with the entries.

7. The “Select a template screen” appears when you click on the “Design Email” button. There are many templates available for designing emails. If you are not comfortable with HTML, it will probably be worth devoting some time to investigate them. Since the author was accustomed to using home-grown HTML, only that method will be described in these instructions. The use of HTML is initiated by clicking on “Code your own”.
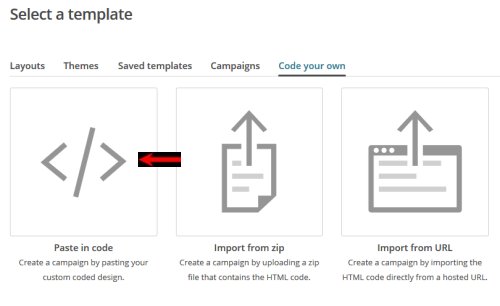
7.1 On the second template screen click on the box labeled “Paste in code”.
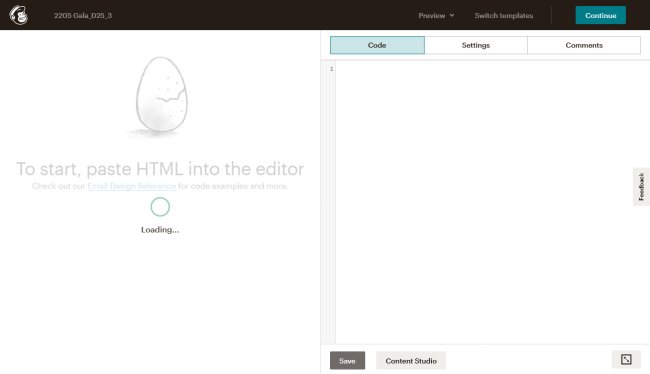
7.2 This is the primary HTML design screen. It has two sides. The right side is for the HTML code. The left side cannot be edited, but it automatically displays the result when the right side is changed. The dividing line can be moved so that the entire result area is displayed.
7.2.1 The HTML for the email is pasted into the textbox on the right.
7.2.1.1 The file containing the HTML source for all previously used emails is stored in the folder on the local computer named MailChimp/HTML/YYYY/Ttttt where YYYY is the year and Ttttt is the name or location of the tournament or other event. The extension, of course is html. It is usually a good idea to start with a previously used file. In this case we will start with the file named April 10_Open.html in MailChimp/HTML/2022/Gala/.
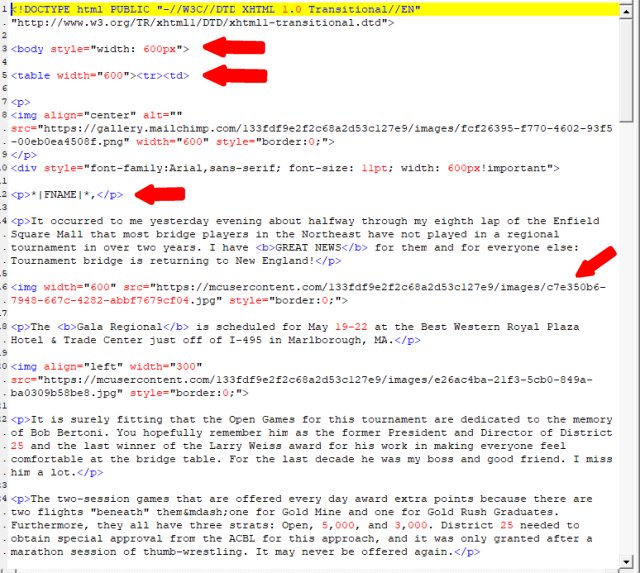
7.2.1.2 Displayed above is part of the HTML source code for Attended.html as it appears in the text editing program UltraEdit-32. If this looks like gibberish to you, you should probably use one of the templates. If you decide to use the "Code your own" method, it would be possible to use the window on the right of the screen in MailChimp to enter the HTML code, but using a text editing program has so many advantages that these instructions assume that that method is employed.
7.2.1.2.1 The standard width for an email is 600 pixels. This is specified twice in the code--in line 3 and line 5. It is necessary to do this because some email clients, such as Microsoft Outlook, do not respect one designation or the other.
7.2.1.2.2 The first <img tag in line 8 of the code is the banner for the New England Bridge Conference. It should at the top of every official email that comes from the district (unless the author specifies not to include it).
7.2.1.2.3 The numerous <p> tags denote paragraphs. They should always be closed by </p> tags. The <p> tag on line 11 displays the player's first name.
7.2.1.2.2.1 MailChimp replaces text within *| and |* characters with the values of columns on the list. FNAME is the field name for the First Name field, which ordinarily holds the familiar_name field from the database.
7.2.1.2.2.2 MailChimp calls these fields “merge tags.” There are many faq's about merge tags in MailChimp's documentation. The most basic one is here.
7.2.1.2.3 The second <img tag contains a link to a photo of the hotel in Nashua. Here is how we could replace it with an image of the hotel in Marlborough, which has already been uploaded to MailChimp.
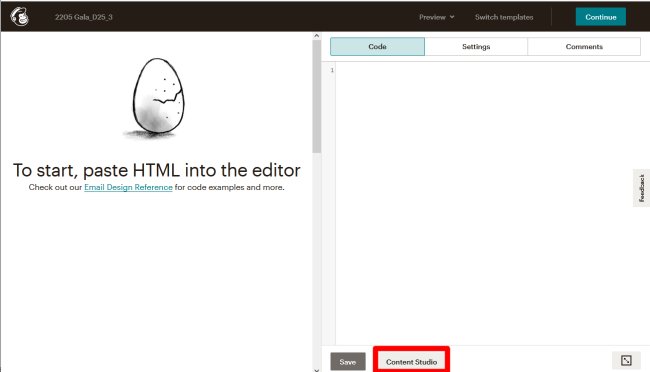
7.2.1.2.3.1 Click on the "Content Studio" button at the bottom of the right side of the two-column HTML design screen in MailChimp.
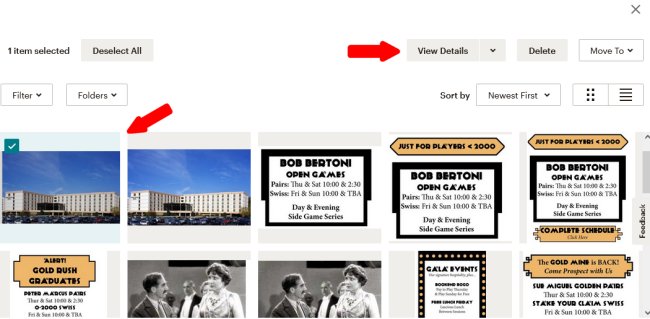
7.2.1.2.3.2 Look through the images until you find the one that you want. Click on it and then click on the “View Details” button at the top.
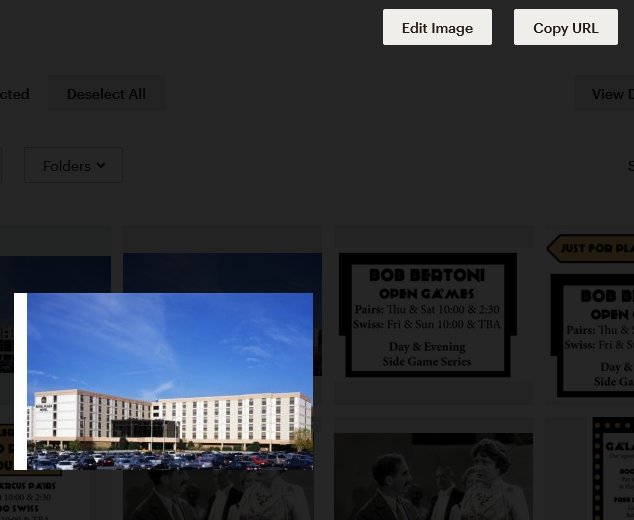
7.2.1.2.3.2.1 Note that the image has about ten pixels of white space on the left side. The image was designed to be used on the right side of the text. The white space provides a margin. The MailChimp program respects entries for margin-left and margin-right in the CSS, but at least some email clients (including MS Outlook) do not.
7.2.1.2.3.2.2 Click on the “Copy URL” button in the upper right corner.
7.2.1.2.3.2.3 A message will briefly appear informing you that the URL has been inserted into the clipboard. You must trust it.
7.2.1.2.3.2.4 Close the Content Studio window by clicking on the X at the top right part of the page.
7.2.1.2.3.3 Return to text editing program that contains the HTML code.
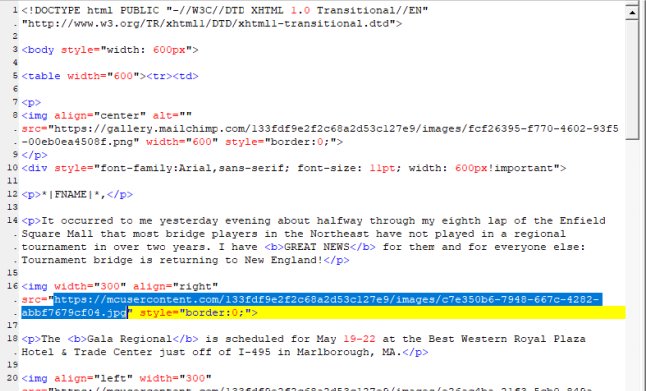
7.2.1.2.3.3.1 Find the "src=" parameter for the second "<img" tag and select all of the text between the quotation marks. This is the URL for the image of the Map that we intend to replace.
7.2.1.2.3.3.1.1 The original image was wide enough to take up the entire width of the screen. Two parameters have been added to place the new image to the right of the text: align="right" and width="300"
7.2.1.2.3.3.1.2 Press Ctrl V to paste in the URL from the clipboard. This should replace the text that you have selected with the new text, but, because both URLs are full or indecipherable text, it might be difficult to tell.
7.2.1.2.3.3.2 Select all of the HTML code in the text editor using Ctrl A and copy it to the clipboard using Ctrl C.
7.2.1.2.3.3.3 Return to the design screen in MailChimp and paste the HTML code into the textbox on the right using Ctrl A (to select all the old code) and then Ctrl V..
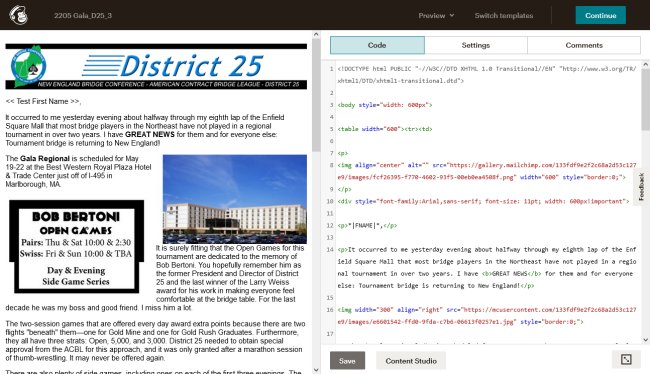
7.2.1.2.4 MailChimp automatically creates the display on the left when the text is pasted into the text box on the right. Of course the text that was appropriate for the original email no longer matches the images. You can easily fix that by going back to the text editor and revising all of the text that is within the paragraph tags. All of the paragraphs start with <p> and are closed with </p>. When it seems right, copy and paste.
7.2.1.2.5 You can delete unwanted images by removing the image tags. They all start with <img and end with >"
7.2.1.2.6 Suppose that you want to add a new image that you found on the Internet on the left side of the text a little way down the page.
7.2.1.2.6.1 Make sure that it is legal to copy it and that it is a jpg file. Then copy it. Usually you must right-click on it and select "Copy Image" from the pull-down menu.
7.2.1.2.6.2 Start your image editing software in a new session.
7.2.1.2.6.3 Paste the image that you saved into your image editing software's work space.
7.2.1.2.6.4 Add a little bit of white space on the right in order to provide a margin. This may involve layering it onto an empty image.
7.2.1.2.6.5 Save it as a jpg file in the MailChimp folder.
7.2.1.2.6.6 Return to MailChimp's design screen. Click on the “Content Studio” button again.
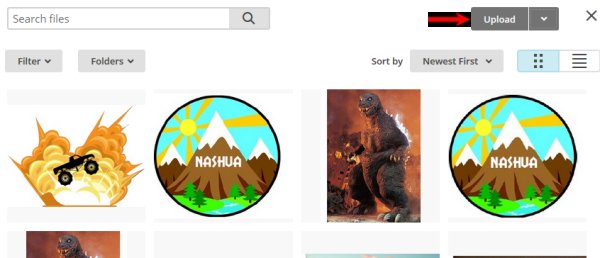
7.2.1.2.6.7 On the Content Studio screen click on the dark grey “Upload” button near the top on the right.
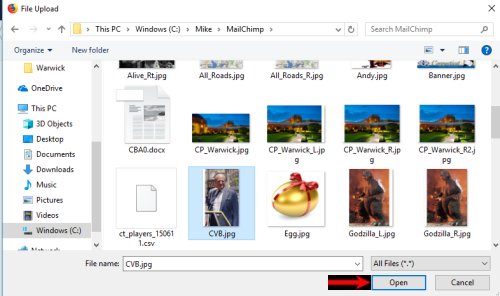
7.2.1.2.6.8 Find the image on the local system, click on it, and then click on the “Open” button at the bottom.

7.2.1.2.6.9 A little window should appear with a thumbnail of the image. If the correct image is displayed, click on the phrase “Copy URL.”
7.2.1.2.6.10 Now return to the text editing program and determine where the new image should go. Copy one of the <img tags to that location.
7.2.1.2.6.11 Follow the instructions in 7.2.1.2.3, but replace the URL for the <img tag that you just moved instead of the original second <img tag that you previously worked on. Make sure that the new image has the parameter align="left".
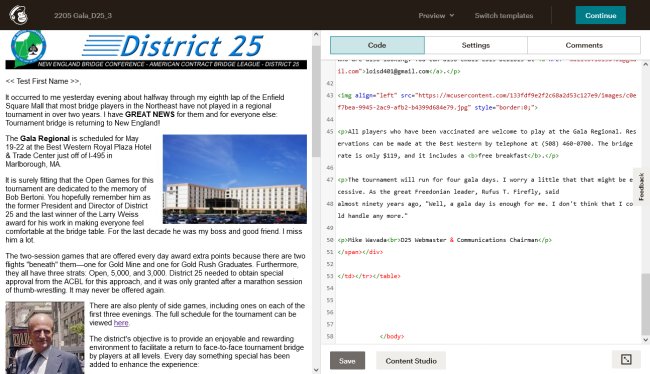
7.2.1.2.6.12 Displayed above is what the email looks like when the link for the new image has been pasted into the source file in the text editing program, and all of the source has been copied and pasted into the work area on the right in MailChimp.
7.2.1.3 It is often important to provide a link to a website or an email address. A link can be applied to a section of text, an image, or virtually any thing else.
7.2.1.3.1 If a document or image that should accompany the email has not been posted on the Internet, upload it (or ask someone to upload it) to NEBridge.org (explained here).

7.2.1.3 The URL for any web page appears in the line in the browser that is at the top of the screen. It starts with http: or https: It can be copied to the clipboard by selecting the entire URL as it appears on the browsing line and pressing Ctrl C.
7.2.1.3.2 Insert the following code into your HTML text file at the point that you wish to provide the link: <a href=""></a>.
7.2.1.3.3 The URL should be typed in or pasted from the clipboard (using Ctrl V) in two places: 1) between the quotation marks after href= and 2) between the > and the <. The first one provides the link. The second one provides the text for the link for those recipients who use email clients that do not allow them to click on hidden links.
7.2.1.3.4 If you think that the link that appears in the text is too unseemly, replace it with the word "here" or whatever seems appropriate in the context. Do not be too surprised, however, if someone reports that the link does not work for them.
7.2.1.3.5 A link to an email address requires the following HTML code: <a href="mailto:"></a>. Then insert the email address in two places: 1) after the : after mailto and > and the <. So, a link to Mike@Wavada.org can be created by inserting <a href="mailto:Mike@Wavada.org">Mike@Wavada.org</a>
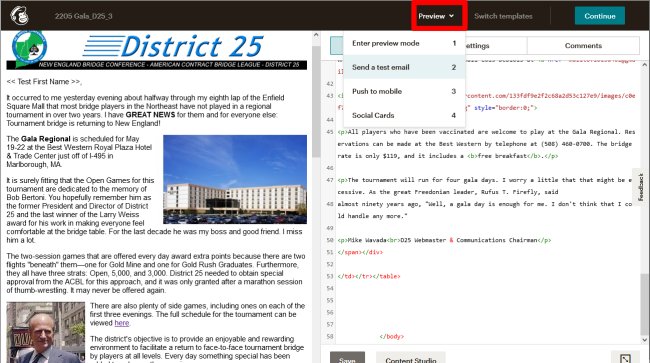
7.2.1.4 When everything appears to be OK, click on the “Preview” pull-down menu on the top line and then click on “Send a test email” in the pull-down menu.
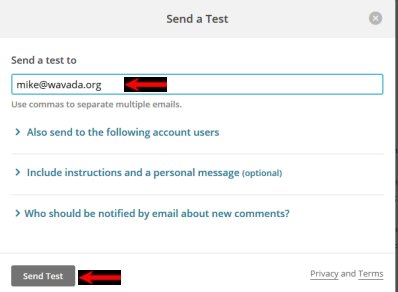
7.2.1.4.1 You can specify on the above window which email address(es) should receive the test email. If you are sending any to other persons, you should fill in the section below "Include Instructions ..." so that the recipients know why they are receiving the email. Click on the “Send Test” button when everything has been completed.
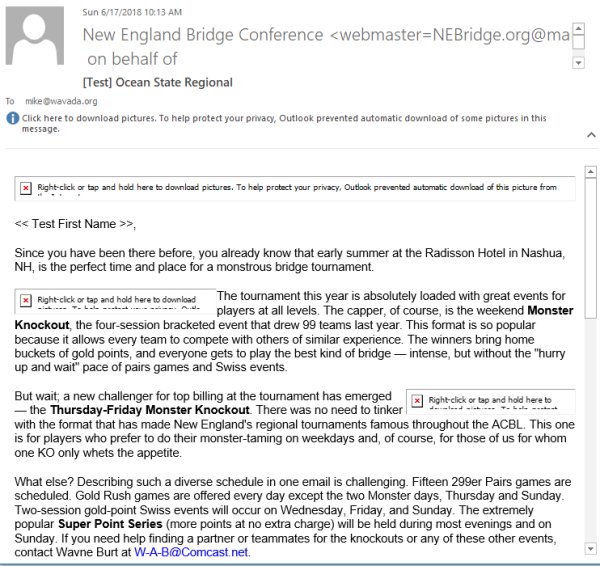
7.2.1.4.2 The test email will look something like the above. You should check it thoroughly. This is your last chance to fix problems.
7.2.1.4.2.1 In the real emails << Test First Name >> will be replaced with the First Name column associated with the email address.
7.2.1.4.2.2 If you can find someone else to check the email, you should take advantage of their services. When it comes to proofreading, it is much easier to find someone else's mistakes. Sometimes, however, there is not enough time.
7.2.1.4.2.3 Right-click to download the images. Sometimes the spacing is different from what appeared in the left window of the design screen. This is especially true if you have used HTML code for ordered or unordered lists.
7.2.1.4.2.4 Check every link to make sure that they are all correct.
7.2.1.4.2.5 If you were not the spelling champion of your middle school, you should copy the entire message and paste it into a text editor that has a spelling check feature. MailChimp does not offer this.
7.2.1.4.2.6 It is probably a good idea to print the email. Sometimes it seems easier to spot mistakes in a printout.
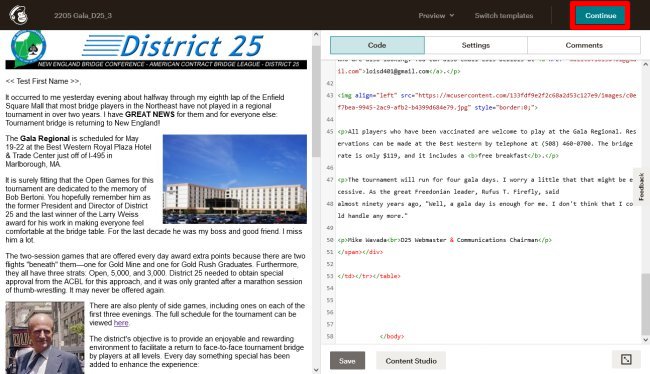
7.2.2 When everything seems OK, click on the “Continue” button in the upper right corner of the email design screen. This will return you to the home screen for emails. Note: You should also use this button if you want to stop working on the content and take it up later.

8. In the Content section of the email home screen begin the final processing by clicking on the word “Edit” near the information about the plain text version of the email.
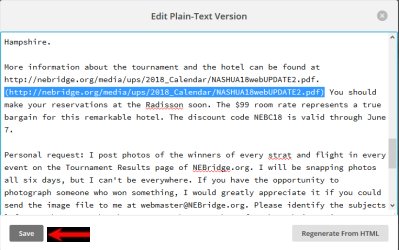
8.1 A strange feature of MailChimp is that the Edit Plain-Text Version screen (above) has a spell checking function that is activated by clicking on any text. Words that it thinks are misspelled are underlined in red.
8.2 Most of the plain-text version is usually as good as can be expected. In some cases the links may be duplicated.
8.3 If tables are included, as they are in the Best in Class emails, they will probably be a mess in the plain-text version.
8.4 Make the text look as good as you can and then click on the “Save” button. Don't spend a lot of time on this. Very few people now use email clients that can only read plain-text.
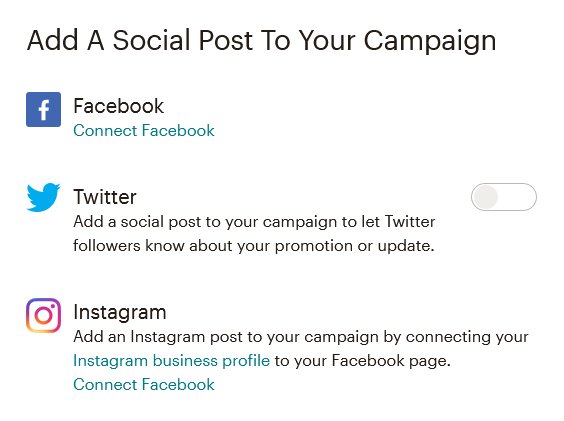
9. At one point it was very easy to post the email on one or more Facebook pages. MailChimp recently changed this feature dramatically. It now seems to be not worth the trouble to do this.
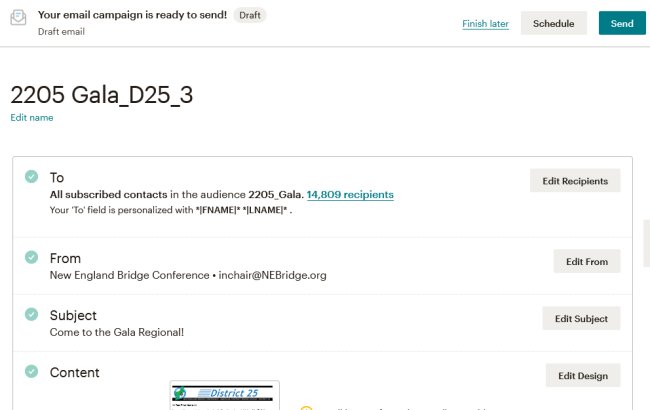
10. Eventually, you must click on the blue-green “Send” button. You will find it in the upper right corner of the home screen for this email.
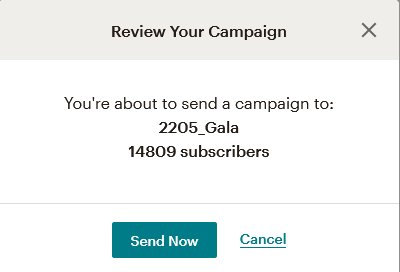
11. You still get one more chance to bail out in this window. If you click on the “Send Now” button, the emails will be sent, and they usually go out very fast.
