

-
A segment in MailChimp is a subset of an audience that includes all contacts that meet a set of criteria. It is like a view of a table. MailChimp's document explaining the concept is available here.
-
Segments have two primary uses:
-
To select a subset of an audience that is to receive a particular email.
-
The select a small group of contacts in an audience to check, edit, or archive. For example, if you need to check one contact in a large audience, the easiest way is to create a very small segment that contains that record, perhaps by specifying the email address or first and last names.
-
-
To create a new segment:
-
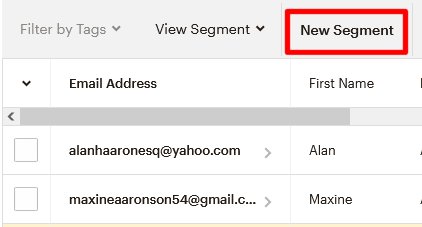
The New Segment button is on the grey line above the title line of the list of contacts. Sometimes it is covered up by a black line of the same size. If so, click on the X on the right side of the line to remove it. Click on the New Segment button.
-
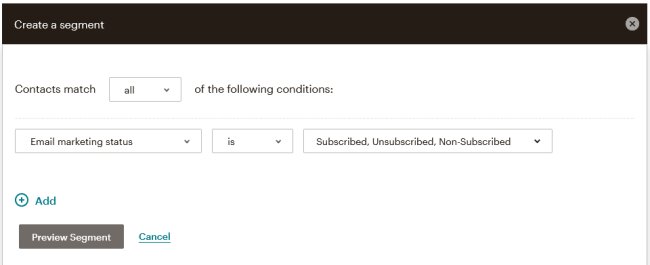
The "Create a Segment" screen will replace the list of contacts.
-
Almost always the value of the "Contacts match" parameter is "all", which is the default. The other value, which can be selected by clicking on the downward pointing arrowhead next to "all" is "or".
-
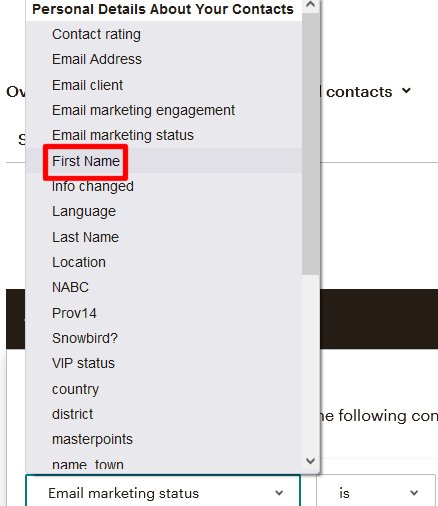
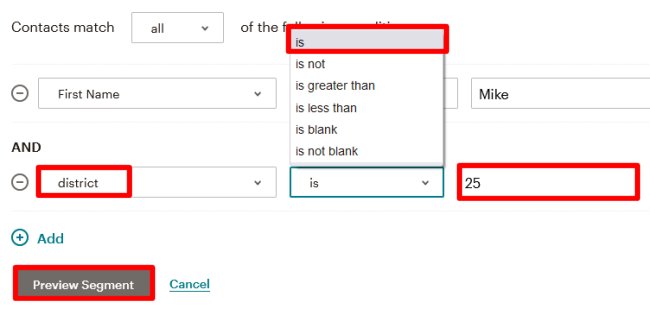
Select the field that you wish to use for the first selection criterion by clicking on the downward pointing arrowhead to the right of "Email marketing status". In this example, we will define two criteria to find a contact record for someone named Mike in District 25. The first one will use the "First Name" field, which is a text field.
-
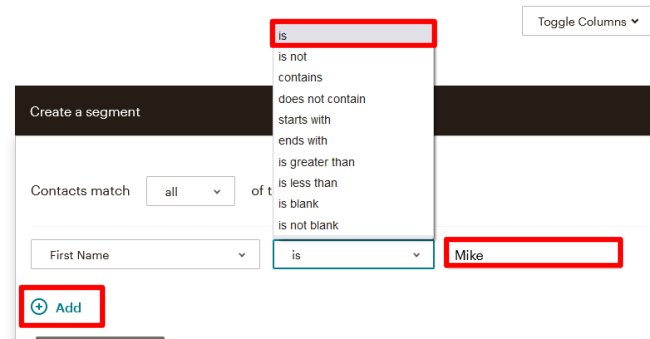
Select the criterion that you wish to use. Some of them, such as "is blank" do not have values, but the "is" that we are using does. So, we have filled in "Mike" in the area to the right. Because we have a second criterion to enter, we then clicked on the "Add" text at the bottom.
-
The field that identifies District 25 is called "district" and it is numeric. So the tests are different. There are a few important things to remember when using the above screen to define conditions for a segment:
-
Only five conditions are allowed per segment. Sometimes the same email should be sent to two different segments. A separate email with everything else identical must be sent to the second segment.
-
Any of the conditions can be changed at any time. If you have just added the third condition and you see a mistake in one of the first two, you can change it.
-
If you want to remove a condition, just click on the circled minus sign next to the field name.
-
-
Since both of our conditions look OK, click on the "Preview Segment" button.
-
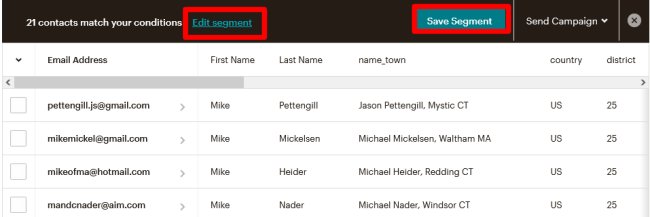
Check the preview list to see if it looks reasonable. In this case all 21 contacts seem to be New Englanders named Mike. So, click on the "Save Segment" button on the black line. If there appeared to be mistakes, we would have clicked on "Edit Segment.
-
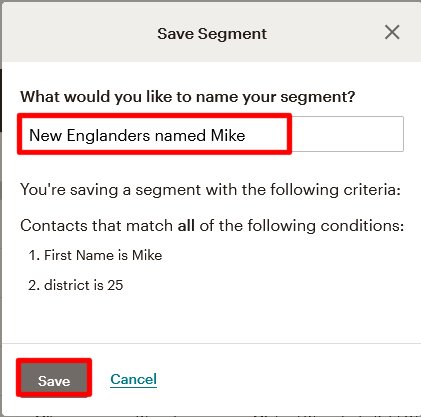
The "Save Segment" window provides us with a place to name the segment and a list of criteria. If it looks OK, click on the Save button. If something needs to be fixed, click on "Cancel".
-
-
-
To work on an existing segment.
-
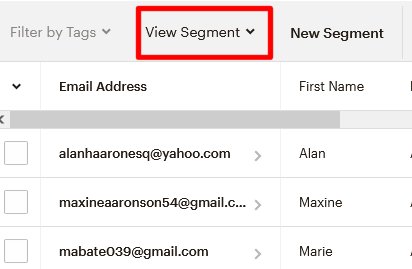
The View Segment button is on the grey line above the title line of the list of contacts. Sometimes it is covered up by a black line of the same size. If so, click on the X on the right side of the line to remove it. Click on the View Segment button.
-
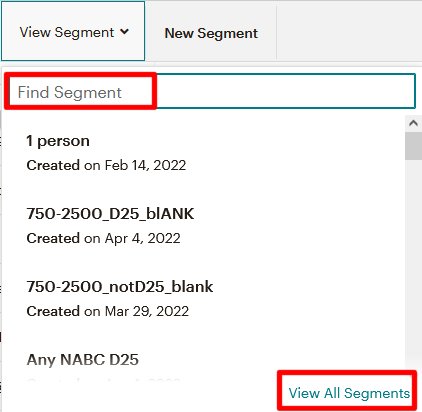
A list of all currently defined segments appears in a window.
-
If you want to edit one segment, you can use the field at the top (contianing "Find Segment") to search for the segment. For example, if you wanted to edit the segment that was created in step III, you could enter the word "Mike" and then click on the word "edit" next to the name of the only segment that contains that word.
-
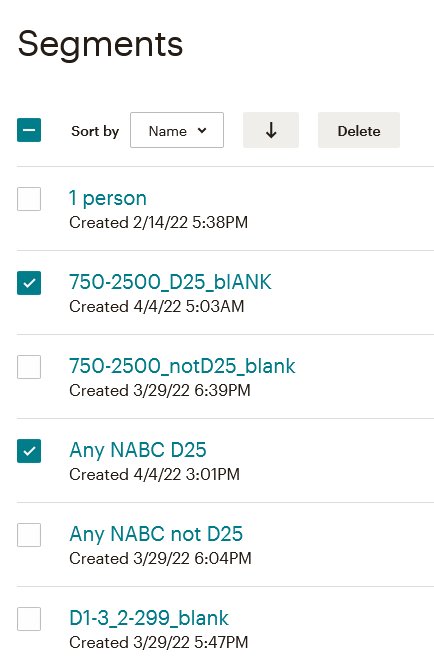
If you wanted to see all of the segments or you wanted to delete one or more, click on "View All Segments" in the bottom right.
-
This is the left side of the screen produced by selecting "View All Segments". It can also be displayed at any time by clicking on "Segments" in the menu on the left. To delete one or more segments, click on the checkbox to the left of the segments' names, and then click on the delete button at the top.
-
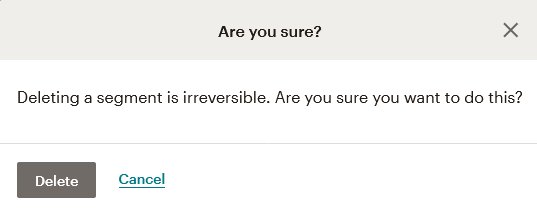
If you are certain that you want to delete the segments, click on the Delete button. Otherwise, click on "Cancel".
-
On the far right of the Segments list are buttons that allow editing of segments and creation of new ones.
-
-
